
Crafting is fun! Crafting is meaningful! Crafting is...messy! No matter how clean you try to be while crafting, it involves ink, glue, glitter, paint, and a variety of other mess-making mediums.
Have a blast making a mess when Scrapbook.com has your back with the ultimate guide to cleaning and organizing your craft supplies! Are you cleaning your craft supplies the right way? Read on to find out!
How to Clean Your Stamp Platform
What's the one thing you always seem to get on your stamp platform that never wants to come off? INK! And while it's pretty simple to take your Stamp Shammy or a damp cloth and wipe away ink that you just got on it, it always seems to stain. The good news is, a few ink stains won't stop your platform from creating amazing stamp impressions. But it's definitely nice when supplies are clean and pristine!
We tested out a variety of solutions for getting even the strongest of ink stains off of our in-house stamping platform so we could pass on the wisdom and knowledge to our fellow crafters. Here's everything we learned.
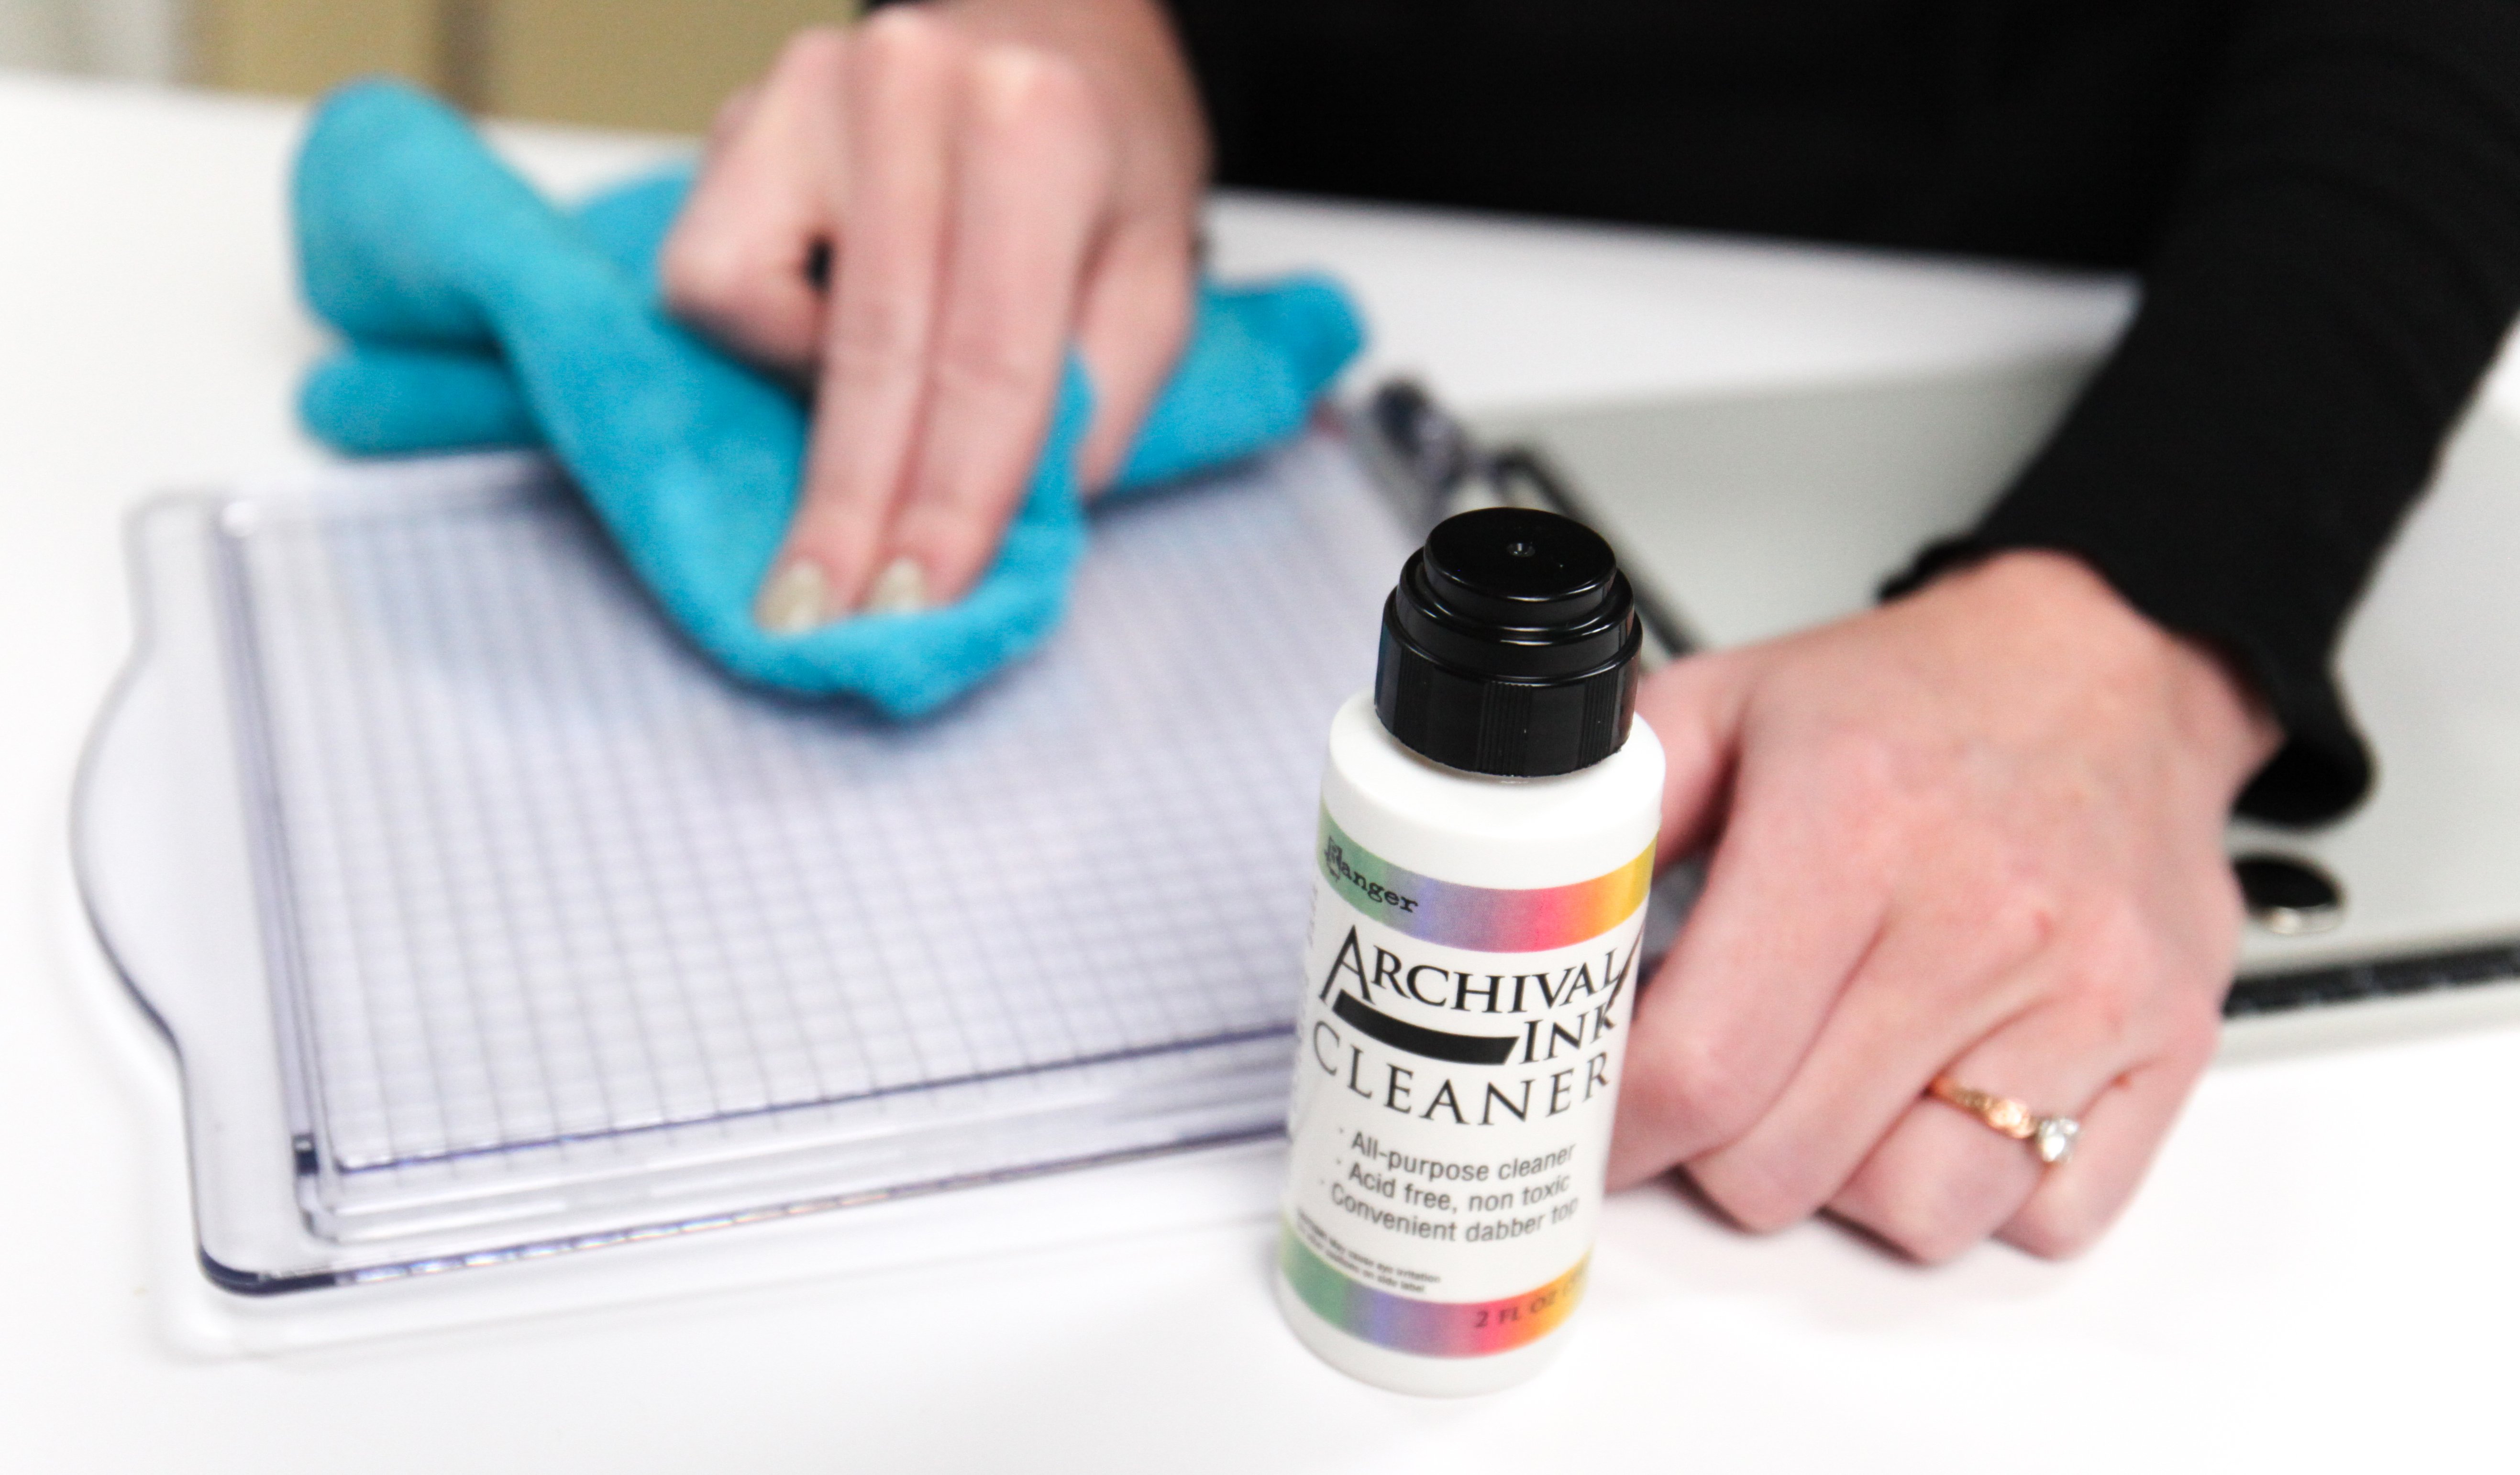
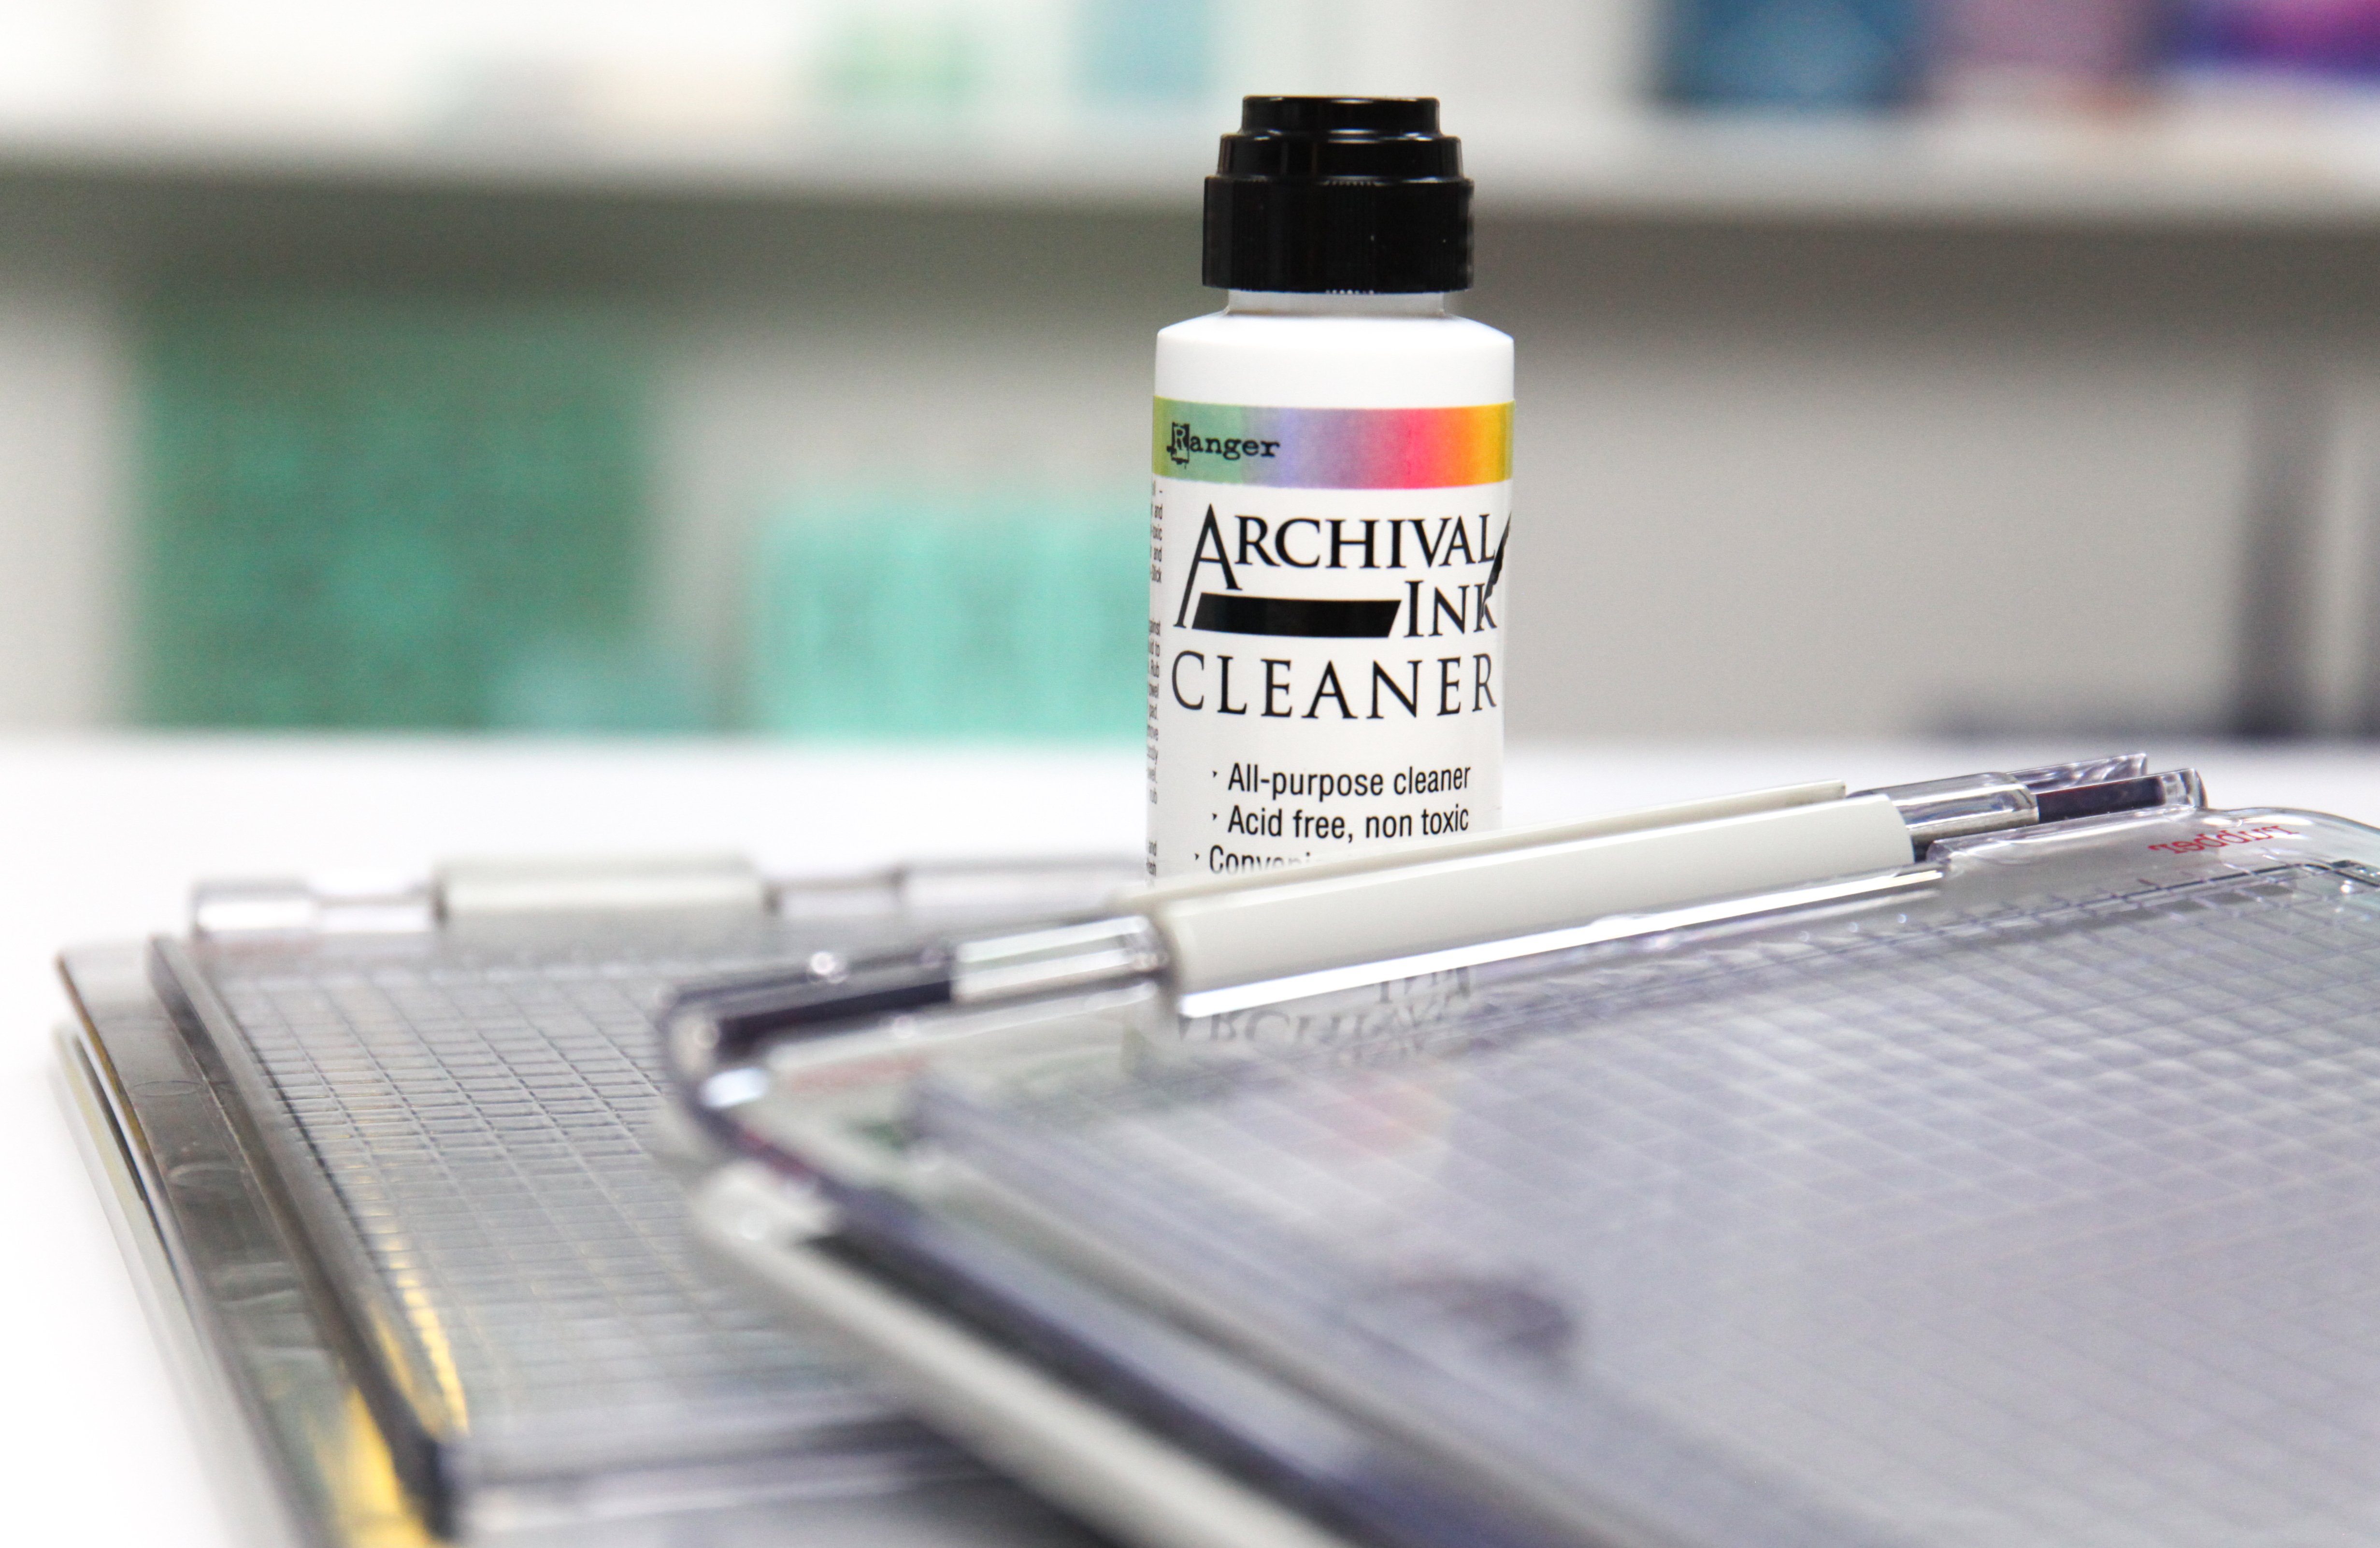 Put down your baby wipes, Stamp Shammy, magical erasers, adhesive removers, alcohol wipes, and nail polish remover! The solution for getting almost all of the ink stains off your stamp platform is Ranger Ink's Archival Ink Cleaner! This all-purpose cleaner comes in a 2 fluid ounce bottle with a dabber top and removes water-based, permanent, pigment, and solvent inks - and it's acid-free and non-toxic.
All it takes is a couple well-placed dabs of the liquid cleaner on your platform and a rag. We used a well-loved microfiber towel, and the results were unbelievable. Our hybrid inks, which are a sturdy fusion of both dye and pigment inks, came off with almost no effort. It was a serious "WOW!" moment. We were immediately impressed and couldn't wait to share this tip with the community.
 While we were at it, we tested another product to see how it cleaned our stamp platforms: hand sanitizer. For scientific purposes, the kind we used contained ethyl alcohol as 65% of the active ingredients.
This was another surprising success! By dabbing just a bit on a microfiber cloth and swirling it around the platform base and lid, it removed a ton of the ink stains and accidental marks from our ink pads.
How to Clean Your MISTI
 Proper care of your MISTI is important for ensuring this magical device stays primed and at the ready for all your stamping needs. Due to the materials, it's made from, the manufacturer recommends very specific care instructions that should be followed accordingly.
- Clean your MISTI after each use. Ensure excess ink is wiped off the surface immediately. Do not allow ink to sit on the lid of your MISTI overnight.
- Be sure to gently wipe the lid clean with a cloth; avoid scrubbing or scratching.
- My Sweet Petunia recommends using Novus Plastic Polish and Cleaner for getting rid of stains and keeping the plastic shiny and clean.
- To prolong the life of your MISTI, avoid solvent or oil-based products, including Staz-On cleaner, Ultra Clean, Windex, Goo Gone, alcohol, or harsh chemicals that could cause tiny cracks in the plastic.
How to Clean Your Magic Mat
Good news! We have an entire article on Magic Mat care, maintenance, and cleaning tips that you can find right here. But for a few top tricks, stick right here.
- To remove paper scraps and flecks of material wedged within the self-healing fibers of your Magic Mat, head on over to your sink with water, dish soap, and a bristled brush. The Magic Mat is more durable than you'd think, so don't be afraid to give it a good scrub.
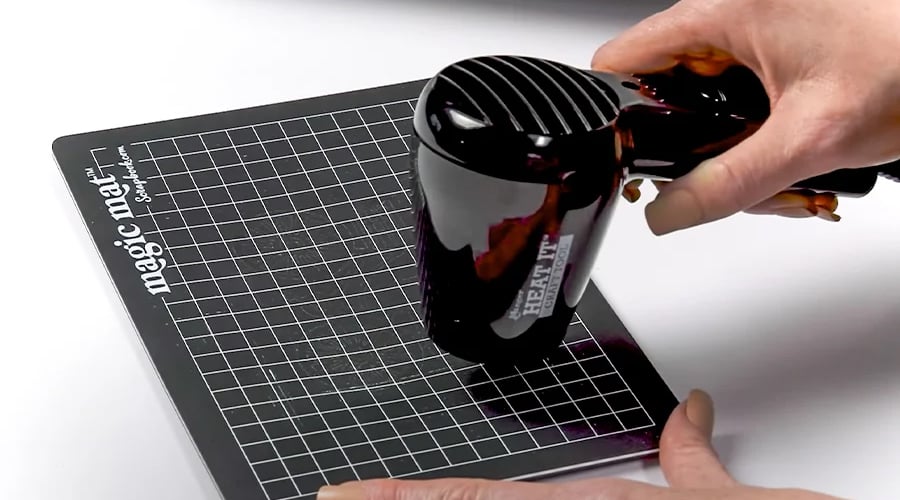
- A little bit of warping is normal with the Magic Mat but easily reversed. To return it to its original form, all you need is a little bit of heat. Get out your heat tool or hair dryer and apply even heat throughout the mat. The heat will cause the mat fibers to loosen up just long enough to straighten out to its original form.
- If you're loving your Magic Mat and want it to last for a while, remember to rotate it and flip it regularly, ensuring you're not always cutting in the same spot on the mat. It can be used on both sides, so give every last inch a good cut!
How to Clean Stencil Brushes
Stencil brushes are amazing for working with ink, acrylic paint, art crayons, gelatos, and more. The effects they make when blending or stenciling are absolutely breathtaking. If you haven't tried these yet, we highly recommend them (and so do our customers!).
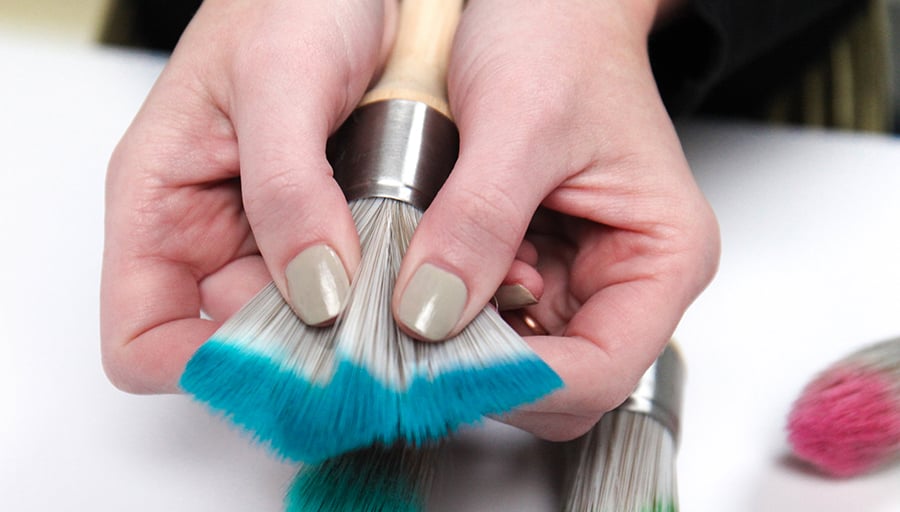
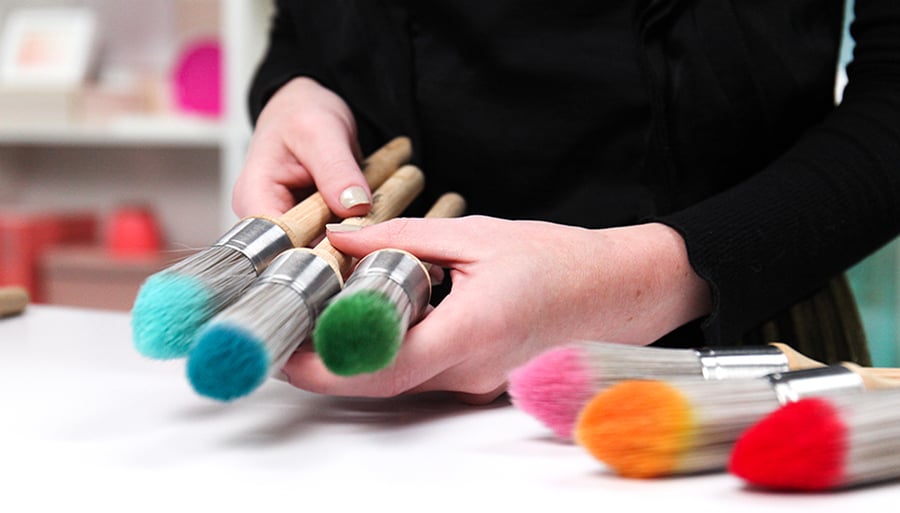 It's important to keep these beautiful brushes clean so that you can use them over and over again. Whatever type of medium you're using, the best way to keep these brushes clean is with gentle dish soap and some water. You'll want to be careful with the bristles so that they don't end up getting splayed out of place. Take care to only submerge the very end of the brush in the soap and water.
When you're done cleaning, use a rag or paper towel to dry the bristles off (again, being gentle), and then wrap a paper towel tightly around the bristles to dry overnight. This will help with keeping the bristles nice and straight.
 While some inks may stain the bristles of your stencil brushes, that doesn't mean you can't use them in different colors. Just make sure that you tap your brush on a clean, dry paper towel before you change colors to ensure there's no active pigment left on the bristles.
How to Clean Ink Blending Tool Foams
Ink Blending Tools with foam applicators have one job - to get inky. So when it comes time to put your colorful, inky blending tools and foams away, how do you clean them?
The easiest answer is: you don't! Sure, you can use a paper towel or rag to dab off the excess ink, but blending foams, especially our Domed Foams, are designed to be used over and over again. That means that you can have a dedicated foam for each color of ink or, with a small stash of foams, each color family.
 If you still want to give your blending foams a cleaning, the best advice we can give you is to be gentle. Remove the foam from the tool and use a slow stream of lukewarm water, and a gentle hand will rinse out most water-based inks. A little bit of household dish soap will also dislodge some of the ink particles deep within the foam.
Please know that almost all inks will stain the foams, but that's perfectly normal - they are still 100% ready for your next project after they air dry!
How to Clean Blending Brushes
Blending Brushes are very similar to stencil brushes mentioned above when it comes to care and cleaning. These brushes in a variety of shapes and sizes are comprised of thousands of tightly compacted, soft, synthetic bristles that allow for absolutely mesmerizing ink blends.
Soap and warm water will easily do the trick for getting dye-based ink out of your brushes but keep in mind that the bristles will need to dry overnight before you can use your brush again.
For using with similar ink colors, you can dab off excess on a rag or microfiber towel and go into a shade in the same color family without compromising your ink or your brush.
 Many crafters stock up on blending brushes to have one for each color of the rainbow - that way, a little strategic dabbing is all that's needed before you use them over and over again.
How to Clean Your Stamps
If you're a stamper, chances are good you've either heard of or bought Lawn Fawn's Stamp Shammy. This convenient, durable, magical cloth cleans all your stamps with just the simple addition of water. It's part sponge, part cloth, part miracle, part 'where have you been all our lives?' in the world of stamping.
Simply wet it down, wring it out, and have it at the ready when you're working with clear stamps, red rubber stamps, and all types of ink. While it will stain, it's still 100% ready to clean your stamps every time. Just re-wet it, and you're good to go.
 Even though the Stamp Shammy has a special place in our hearts, there are plenty of other ways to give your stamps the attention they need to last use after use.
Ranger Ink is a trusted name in crafting and stamping, and their Inkssentials Clear Stamp Cleaner is a high-rated product for cleaning stamps. This simple, affordable solution was developed specifically for your clear stamps to ensure they last. Where your Stamp Shammy or baby wipes will wipe away ink for the next use, this acid-free, non-toxic cleaner will remove water-based and water-resistant ink from even the tiniest crevices of your clear stamps.
Several other favorite brands also offer highly-rated stamp cleaners, like Tsukineko, Ken Oliver, and Technique Tuesday. These liquid cleaners are all compatible with your clear acrylic, photopolymer, and red rubber stamps to preserve their quality and longevity.
There are also a few stamp cleaning pads and scrubbers for stamps that need a little extra oomph to get clean again. The Nuvo Stamp Cleaning Pad and Solution Set is a great place to start for those inky stamps that need a good scrubbing!
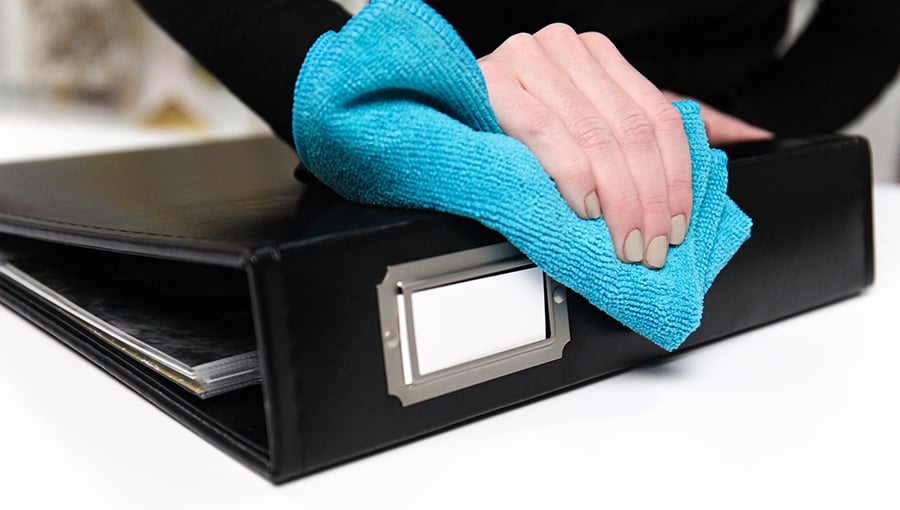
How to Care For Your Scrapbook Albums
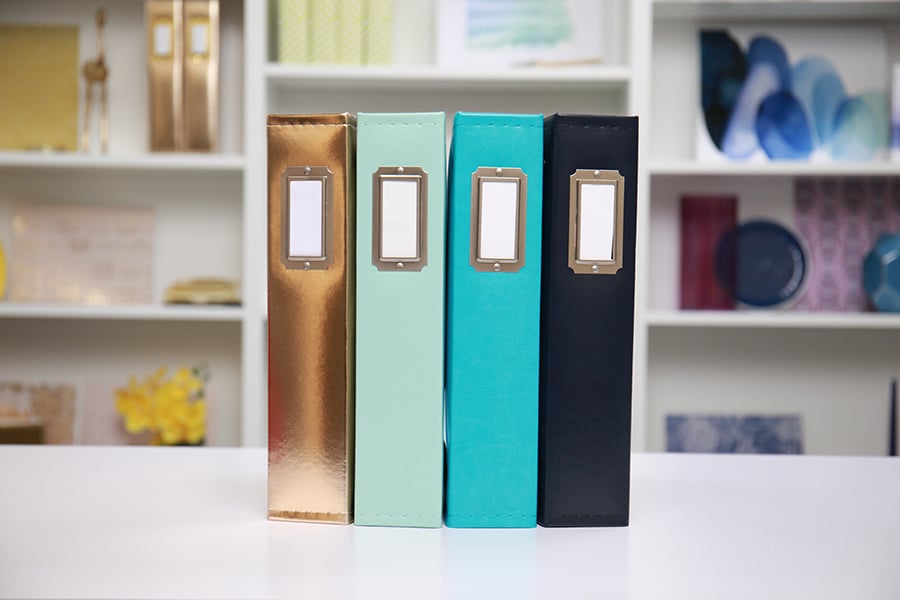 A completed scrapbook album is an absolute treasure to have in your home. But, let's face it, dust is the enemy for these albums that sometimes sit on shelves or coffee tables for years at a time. Here's how to make sure your album is well taken care of so it can be passed down for the next generation to enjoy.
It's important not to get too aggressive with your cleaning supplies on an album. Whether it's made of genuine leather, faux leather, patent leather, chipboard, vinyl, or fabric, you need to make sure you're being gentle. Don't use harsh cleaning wipes, solvents, bleach, or spray cleaners - a simple damp cloth will do the trick just fine for removing even a thick layer of dust.
 If you're noticing a couple tougher spots that need a little more oomph, try diluting a tiny bit of dish soap in some water to rid your album of unwanted grime. You can also use baby wipes - gentle enough for babies and baby's first scrapbook!
If your scrapbook or photo album has metal accents, such as corner protectors, name plates, or bookplates, you will want to ensure they are fully and thoroughly dried before storing again. Leaving moisture on these parts could result in rust or corrosion, which you definitely don't want!
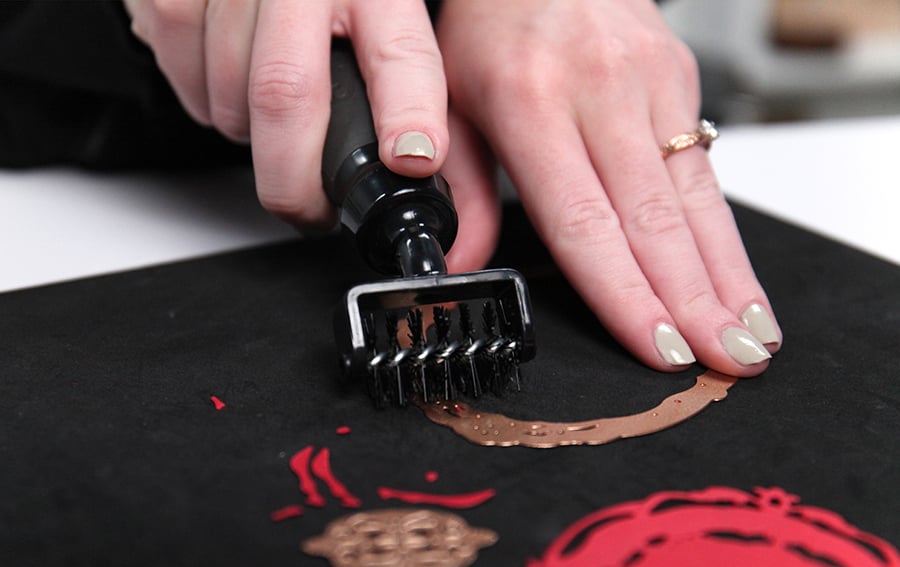
How to Clean Out Your Metal Dies
Intricate thin metal dies are phenomenal for adding amazing details, shapes, sentiments, and scenes to your projects. But when you work with these fascinating patterns with dozens of tiny details, you're bound to get paper stuck in them. And if you don't get the paper unstuck, when you try to use your dies again, they may not cut to their fullest potential.
Luckily, there are tools available for cleaning the excess paper pieces out of your dies.
 Sizzix has several helpful die cutting accessories, including die picks, die brushes with foam pads, and even a mini tool set* that every die cutter should own!
Spellbinders offers a helpful little device called the Tool' N One* that has three different attachments for getting paper out of your dies. With a paper piercer for poking out pieces, a thick bristle roller for rolling on the back of your metal die to extract pieces, and even a little scoop tool, you will never have stubborn leftover pieces again!
*Please note this product has been discontinued.
How to Clean Your Glass Media Mat
For mixed media artists, painters, stampers, scrapbookers, and really any kind of crafter, the Glass Media Mat is a wonderful work station for getting creative. One of the best features of the mat is that it's made of durable tempered glass, which is an ideal surface for many types of mediums.
 When it comes to clean-up on your Glass Media Mat, it may surprise you to learn that most mediums can be cleaned with just water. If you're using water-based inks, paints, markers, pastes, or other mediums, all you actually need is a spritz of water and a cloth to get that shiny surface looking brilliant again. Wipe away to start fresh another day!
For tougher solvent-based or permanent ink products, collage medium, decoupage, paints, and other tougher substances, water is not going to get the job done. But you know what will? Hand sanitizer. That's right, folks, from the master crafter Tim Holtz himself, this is his go-to cleaning product for getting the Glass Media Mat looking pristine.
 As a cautionary note, it's important to know that you should not put any alcohol-based inks on the silicone mat piece of the Glass Media Mat. It will result in what Tim calls "a whole lot of ugly that will never go away."
Alcohol inks can be used on all the glass areas, but the silicone mat's weave texture will permanently absorb that ink and won't entirely come off. If you've accidentally gotten carried away, no fear, replacement non-stick mats are available!
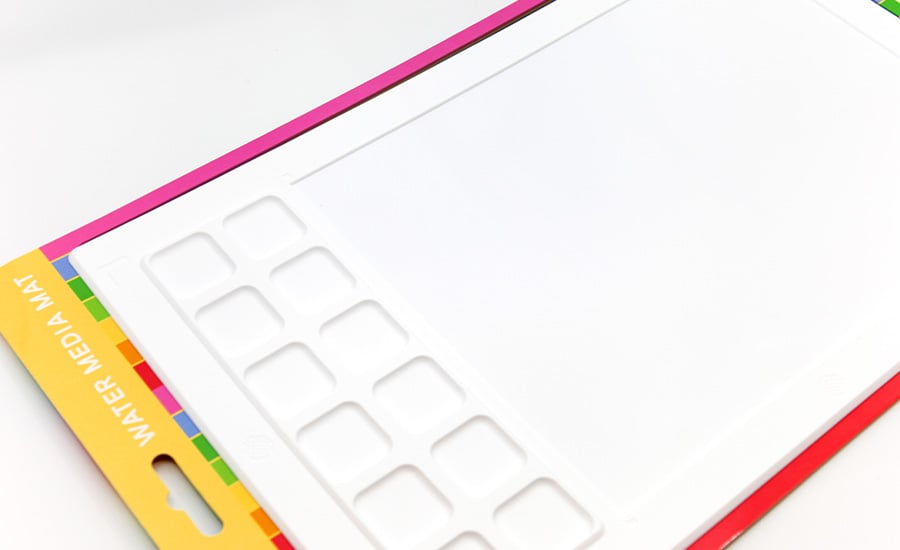
How to Clean Your Silicone Craft Mat
Waffle Flower transformed the way many crafters stamp, watercolor, paint, and create with their uniquely designed Water Media Mat. But messy techniques make for a messy Media Mat! Several other brands, including Ranger & Scrapbook.com, have fabulous silicone mats that keep your work surface protected and make for easier crafting.
To keep your silicone mat looking its best, it is important to clean up your materials as soon as you're done with them. It may be tempting to leave watercolors or water-based inks in the wells until next time, but that increases the likelihood that the hues may be left behind after a good wipe down. Cleaning them up with a lint-free cloth, microfiber rag, or baby wipe and gentle pressure before they harden or dry is a good rule of thumb.
 If you're working with loose glitter, embossing powder, or other fine particles or granules, they will stick to the mat very easily. Even dust particles, clothing fibers, and pet hair will be instantly attracted to the silicone. When this happens, take a trip to the sink or a nice bucket full of warm soapy water to dislodge all those unwanted bits from your mat.
 Silicone mats are not stain-proof, so some inks and paints (even water-based ones) may leave faint stains behind. If you're concerned about staining your beautiful white surface, test out a bit of your medium on the back of the mat first before using it on the front of it.
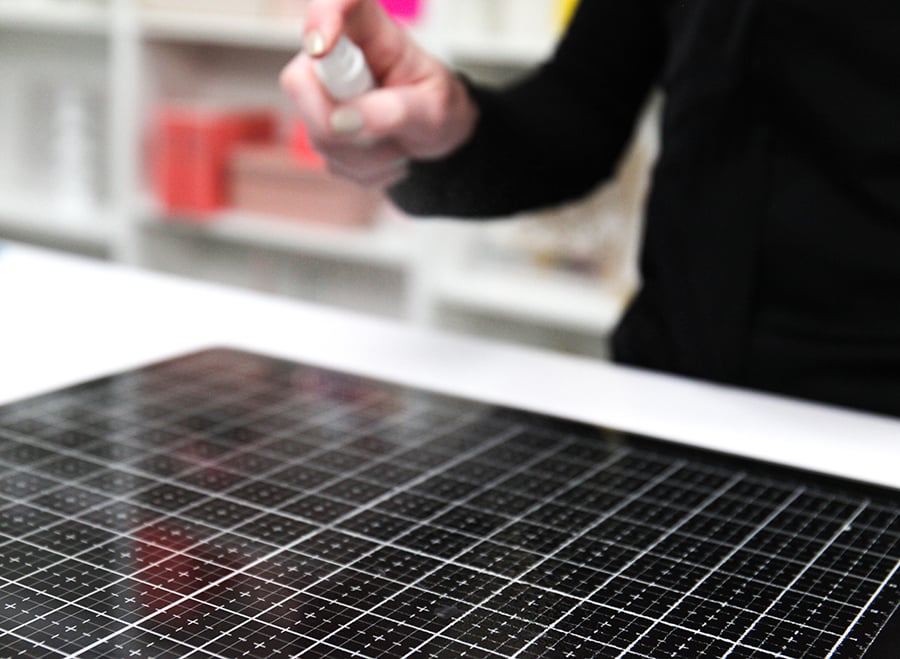
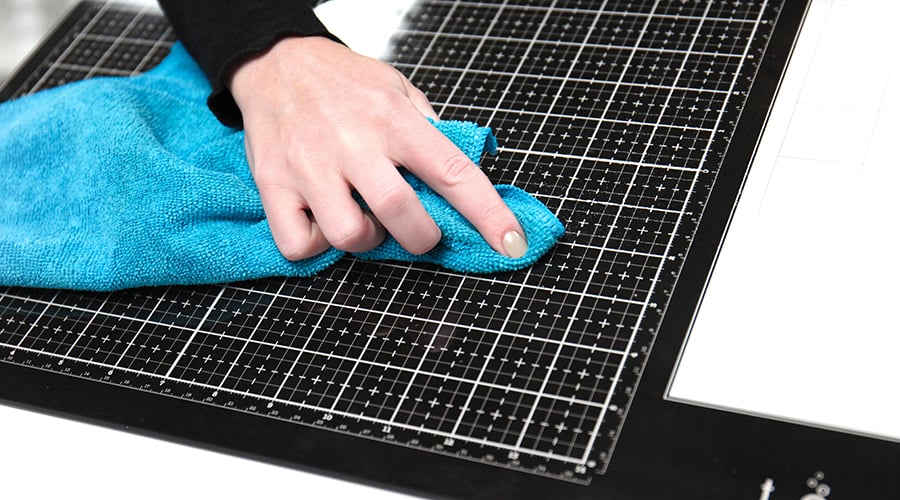
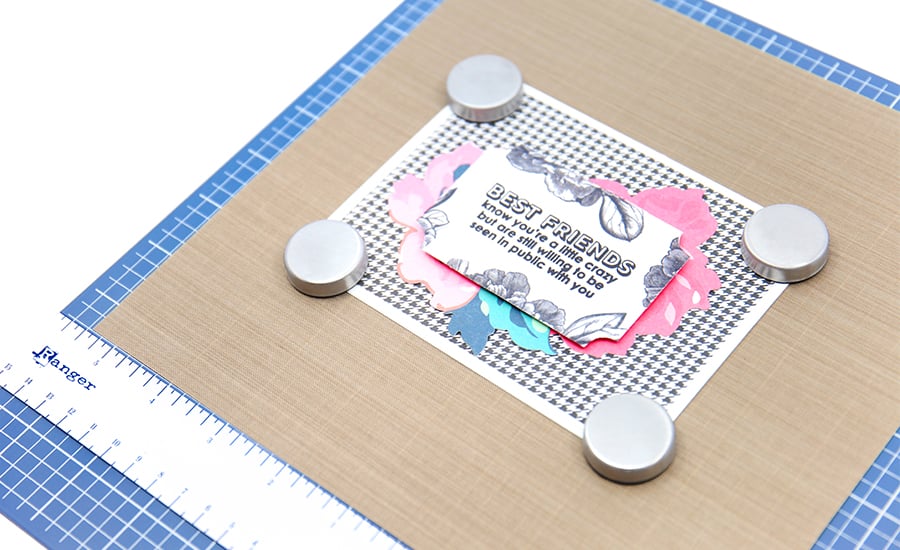
How to Clean Your Make Art STAY-tion
The Make Art STAY-tion by Wendy Vecchi for Ranger is a big hit with all types of crafters. It's like an "extra set of hands" for working with inks, stencils, heat embossing, and so much more. But what's the best way to keep it clean?
It's important to note that the Make Art STAY-tion is not a replacement for a good quality craft sheet. You can even pick up a mini version of the Non-Stick Craft Sheet that is the perfect size for using with your STAY-tion (and you can still see the gridlines through it!). Just place it down and use the convenient magnets to hold it in place.
 If you've gotten any dye-based inks or water-based products on the metal surface, you can easily clean up with a little bit of water and paper towel or soft cloth. Be sure not to use any solvent-based or harsh cleaners on your STAY-tion, as this could remove the helpful gridlines.
Helpful Tip: Remember that your Make Art STAY-tion has two sides! The front has a beautiful and helpful grid pattern and the back is a completely blank metal surface. If you're concerned about using alcohol-based inks and other products that could stain, turn the STAY-tion over and work on that side!
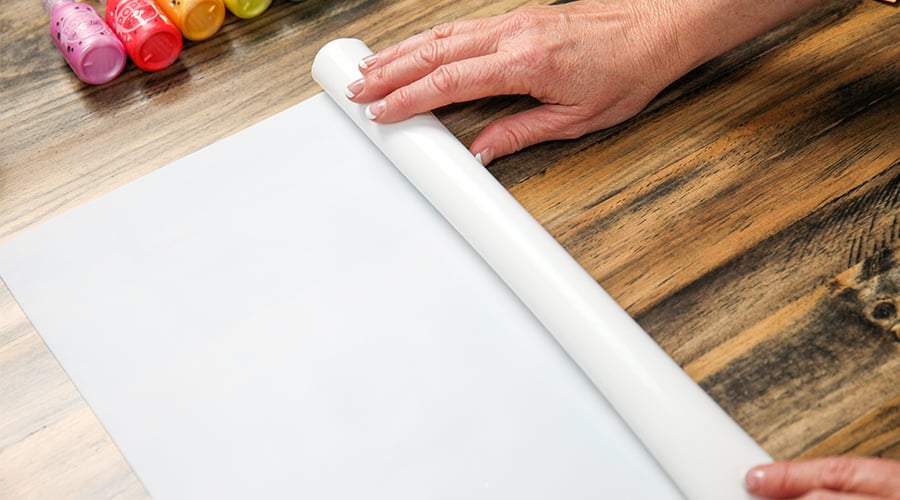
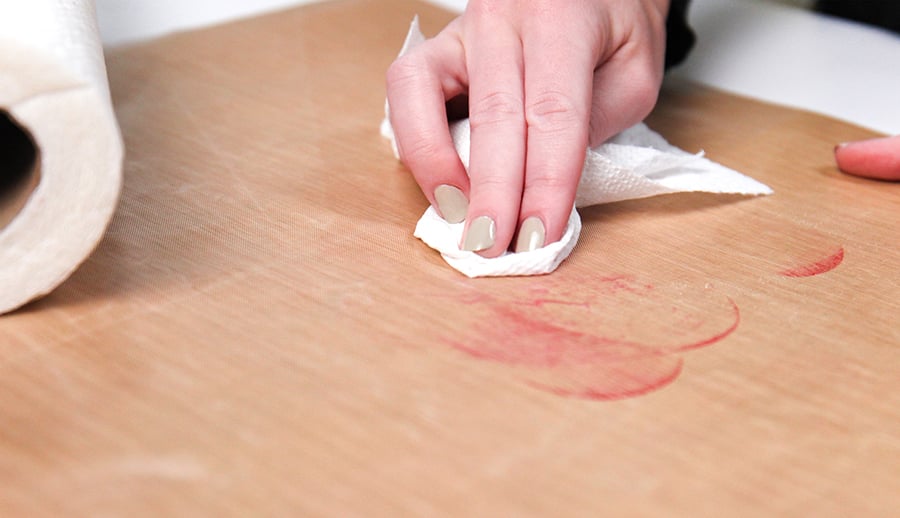
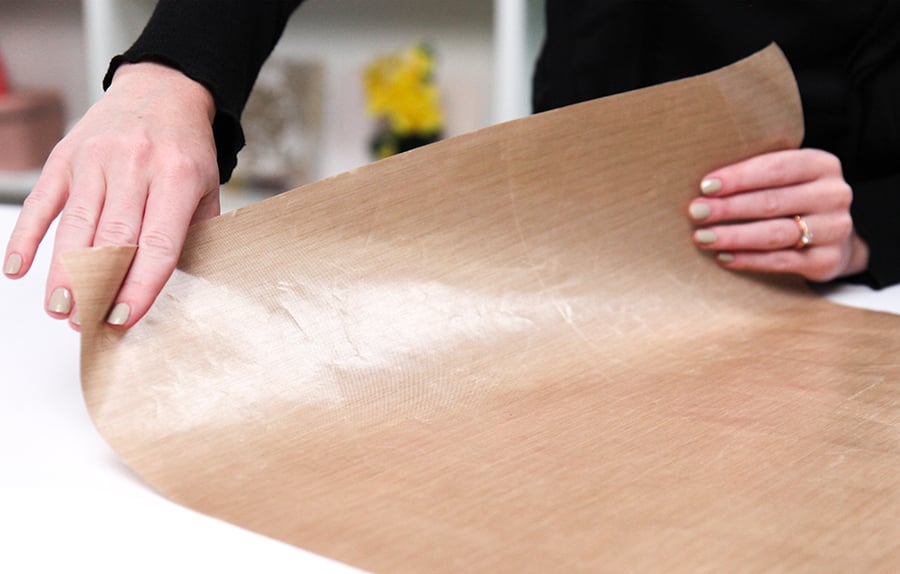
How to Clean Your Craft Sheet
The best thing about having a non-stick craft sheet, like the 5-star rated one from Ranger, is that its sole purpose is to get messy while protecting your work surface. The slick, non-porous, non-stick material was developed to repel liquid-based products and allow for some amazing techniques with inks, paints, pastes, and more.
 Most materials come right off your craft mat with a dry paper towel - no, really! Water-based products bead up and just wipe right off. For some extra oomph, take the sheet over to the sink and rinse it off under the faucet.
In the event some acrylic paint, glue, paste, or like product ended up drying on the sheet, it may take a little more effort. A palette knife or even an old plastic card can help you to scrape off globs of dried glitter glue and acrylic paint with ease.
For thin layers of dried on products (such as texture paste), we turned to our microfiber towel and hand sanitizer. A little bit of sanitizer did the trick for easily removing almost everything from the craft sheet!
How to Clean Your Scissors
Let's face it, we've all been there: using double-sided adhesive sheets, foam tape or dots, or mounting foam, and you need to make a cut. Of course, you reach for your scissors. They get the job done, but sometimes your precious scissors end up a little icky and sticky. We have you covered to get those snips back in tip-top shape!
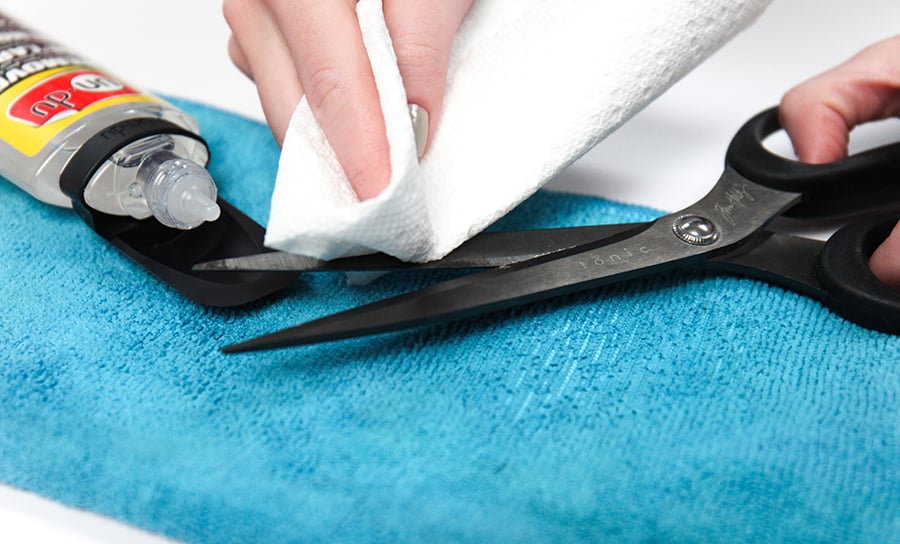 By far, the customer favorite go-to product (and ours too!) for removing sticky residue and adhesive build-up is UN-DU. Just grab a paper towel or rag and put a tiny bit of UN-DU on it. A little bit goes a long way! Then, just give those scissors a good, careful rub down. In seconds, UN-DU has un-gunked your scissors!
UN-DU also has a wealth of other uses, such as removing stickers, photo squares, and even photos from magnetic albums since it's photo-safe and acid-free. This is a product that every crafter should have on hand!
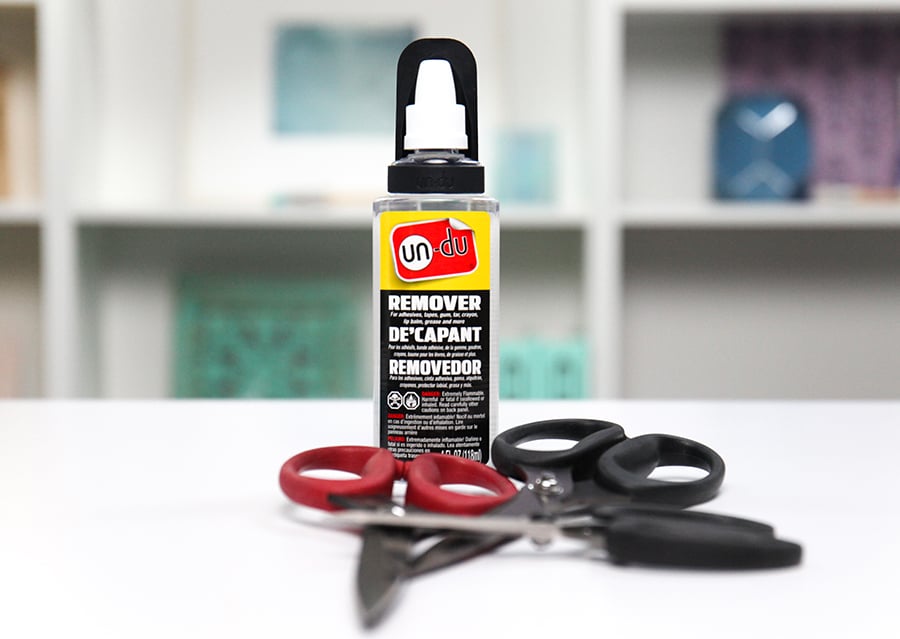 If you don't happen to have any UN-DU (or you're patiently awaiting your Scrapbook.com order!), there are a few cleaning hacks that we've done the investigative work on just for you.
Both hand sanitizer and rubbing alcohol or alcohol swabs also do the trick for getting rid of adhesive build up. Make sure you're being careful along the blades of your scissors, so you don't end up injured. A heavier cloth or rag will help with keeping your fingers safe.
Looking for a natural solution to sticky scissors? Try tea tree essential oil! This natural product worked great with a microfiber towel and a little careful scrubbing on the blades!
Tip: As tempting as it could be to grab your Stamp Shammy for removing scissor build-up, don't do it! It's made for removing ink, not adhesive, and you could possibly slice right through your Shammy!
Investing in a solid pair of non-stick scissors is also a good idea to avoid having to stop mid-project and clean up. They may still attract a little bit of adhesive now and then, but not nearly as much as an ordinary pair of scissors.
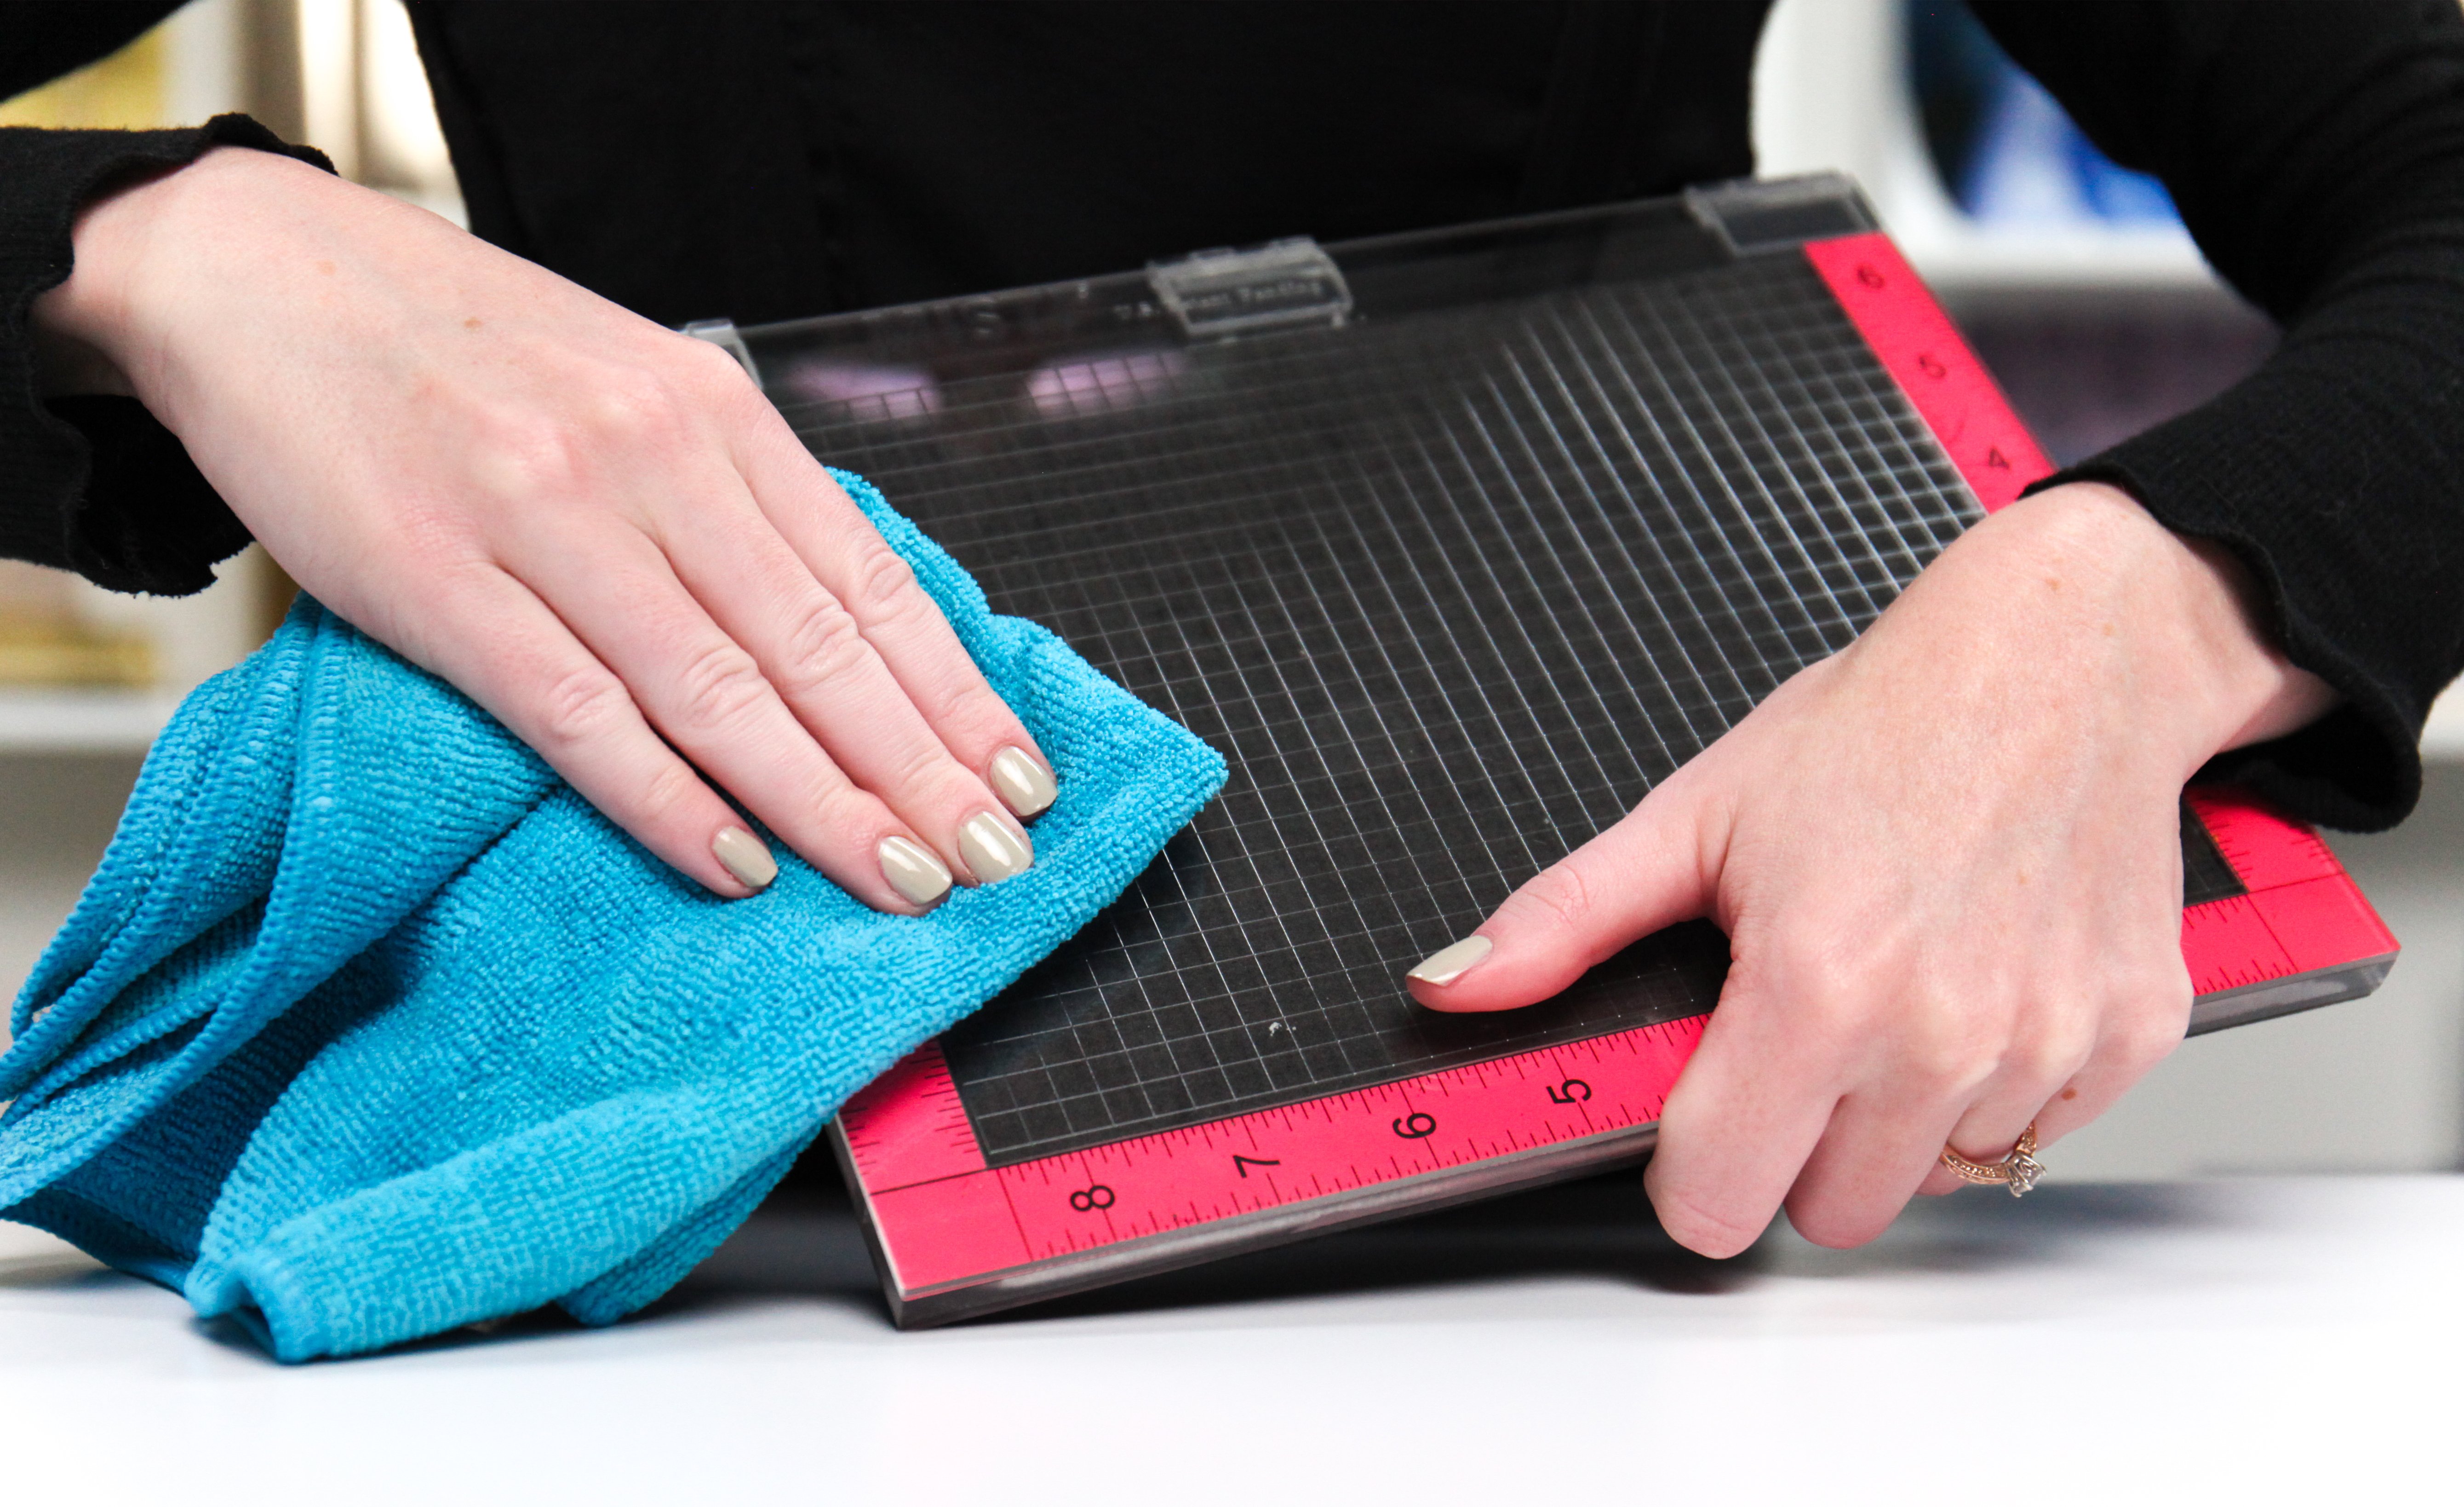
How to Clean Your Paper Trimmer
When it comes to paper trimmers, you really just want one thing: for them to cut well! Which is why it's important to clean and maintain your handy paper cutting sidekick. Whether you prefer a guillotine style cutting action or a rotary one (or maybe both!), we have some great tips that will keep you cutting day after day!
If you love a rotary trimmer that slides back and forth with its mighty, tiny blade, then you're familiar with the track or groove that the blade makes with each cut. Through continued use, especially with things like heavy cardstock, fabric, and glitter paper, this track can start to get filled with paper fibers and debris. So much so that it could convince you that it's time for a new blade! Before you replace it, let's try maintaining it first!
 Using a small, pointed tool, like a die pick or craft blade, carefully run through the track every few weeks to ensure that it's clear of any excess materials. That way, your tiny rotary blade has more than enough clearance to run smoothly and give you a precise cut every time!
Even if your trimmer has a replaceable cut bar, try and keep the groove as clean as you can to avoid getting hung up or snagged and ruining the cut line of your paper.
Another common paper trimmer hang-up occurs when you're cutting double-sided adhesive to size or even cutting a project where the glue hasn't entirely dried: adhesive build-up. The answer to this problem is exactly the same as un-gunking your scissors! UN-DU, hand sanitizer, or rubbing alcohol will do the trick, but you must be careful when working with the sharp blade of your trimmer.
A guillotine or rotary blade is extremely sharp, so work slowly and with care to avoid cutting your fingers.
How to Clean Off Your Stencils
When you're creating with stencils, the absolute best way to keep them clean is to immediately wipe them off carefully before anything has a chance to dry on them. Scrapbook.com understands that this doesn't always happen. It's totally alright - we've been there! But you know what that means? We know exactly how to get caked on paint, gesso, texture pastes, ink, and more off your favorite stencils in no time!
 One of the most important steps in cleaning your stencils is ensuring that they are laid out completely flat before you try to clean them. It is not recommended that you hold the stencil in one hand while you wipe with the other. This could bend and damage your stencils, especially if they have intricate cut-outs and designs.
We had the most success removing a variety of materials with the very handy hand sanitizer we keep mentioning.
 It's a surprising household staple that is getting our craft supplies looking nearly new in no time! Gently rub the hand sanitizer over the stencil, using a soft bristle brush (like a toothbrush) to carefully remove the stuck on medium. Choose only one direction to rub (not back and forth) to avoid bending any details of the stencil.
Rinse the stencil well with water and lay it flat on a towel to dry.
How to Clean Your Craft Area
Glitter Spills
Working with Shimmer Powder, embossing powder, loose glitter, sequins, and even tiny beads is all kinds of fun until a dreaded spill happens. Sure, you can try and salvage as much of your precious materials as you can scoop up, but what about the remaining mess that's left? You just have to roll with it!
 Some of your favorite brands have developed special tools just for these types of messes. Ken Oliver's Tacky Roller* and the We R Clean Up Roller* are reusable, sticky clean-up tools for gathering every single glittery sparkle, bead, and tiny scrap from your workspace. The best part is, they don't leave any sticky residue behind. Just rinse them off in a little bit of water, and you're ready to roll for the next mess.
You can also look to a fun little mini-bot to help you out with glitter, powder, and tiny debris on your work surface - the Glitter Mini-Vac from We R! This rechargeable little device will suck up tiny particles on your desk or table within seconds!
*Please note this product has been discontinued.
Paint Splatter
If you're a lover of Distress Oxide sprays, mists, and splatters on your projects, then you really need a tool to help you get messy and creative in a controlled environment. Check out the Spritz Box and the Tim Holtz Splat Box for the exact size and shape needed to create splattered brilliance on your project and not your craft table!
Protect Your Surface
The last thing you ever want to deal with is any type of damage, permanent stains, or marks on your work surface, be it a desk, table, even your floor! That's why it's incredibly important to always protect your surface at all costs. You never know when you'll have an oops moment, no matter how careful you're being.
 While Ranger's Non-Stick Craft Sheet is a tried and true customer favorite, there is a huge selection of craft mats to choose from, depending on your preferences and work habits. There are cutting mats in glass and self-healing material, so you don't cut into your table, 100% silicone work surfaces like the Waffle Flower Water Media Mat, and many more!
Don't wait to protect your kitchen table, countertop, desk, or floor - protect your surface now instead of trying to fight pesky permanent stains and irreparable damage later!
How to Organize Your Craft Room
Stickles, Nuvo, reinkers & More!
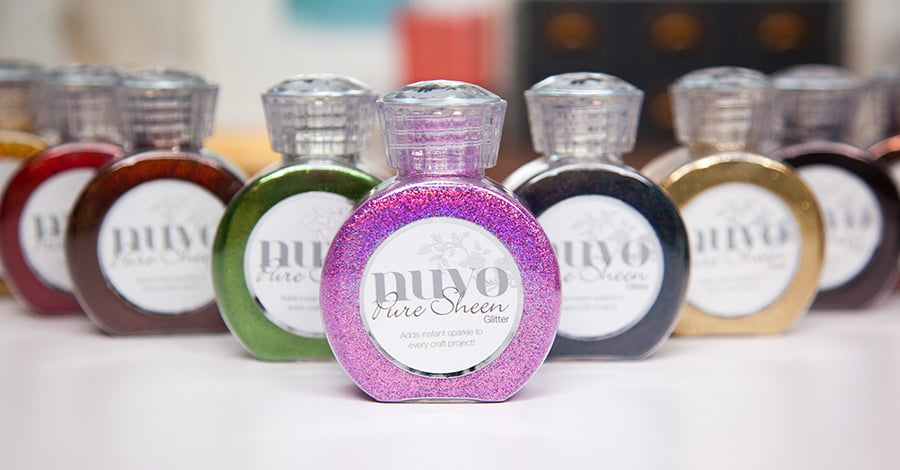
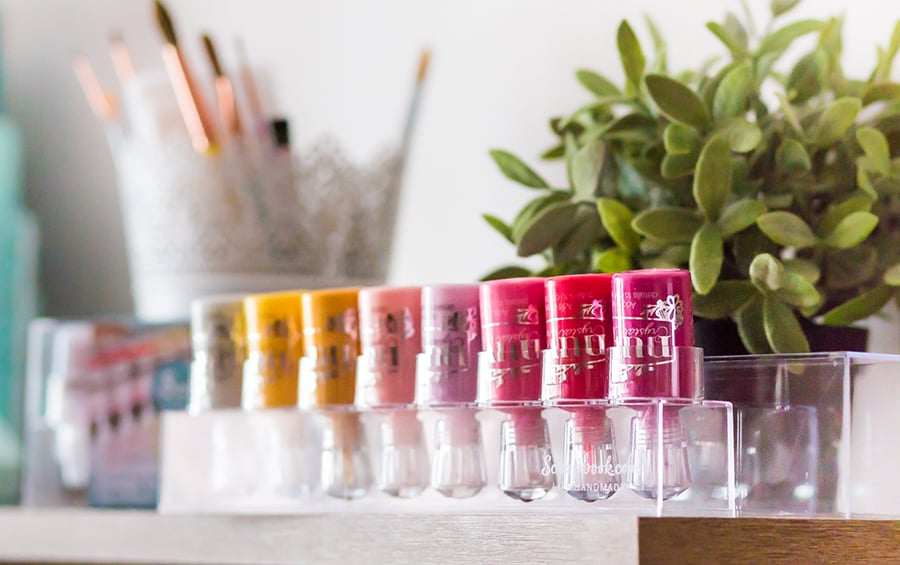
Liquid accents, reinkers, and glitter glues come in hundreds of original hues, and let's be honest, we want ALL of them. But when a prized collection of Stickles, Nuvo Drops, acrylic paints, and reinkers starts expanding, your supreme happiness can sometimes turn into a little bit of unease as they slowly take over every inch of your craft spaces.
They get tossed in drawers, craft totes, scattered on a desk or workspace, and then you can't find the absolutely perfect shade you're searching for when the time arises.
 That's why we designed the ColorCase Collection. These sturdy clear plastic organizers are the perfect solution for your bottle needs. The Scrapbook.com exclusive organizer comes in two different sizes.
One version of the ColorCase accommodates ten .5-ounce bottles. This organizer is perfect for organizing your Stickles, Liquid Pearls, and even your reinkers.
The other version of the ColorCase holds eight 1-ounce bottles and will hold Nuvo Drops, Tim Holtz Distress Paint, and many more 1-ounce products.
In this crystal-clear case, you'll be able to easily locate each color for convenient creating. Not to mention the fabulous organizational beauty of the clear plastic and rainbow of colors they accommodate. You'll be obsessed with the way they function and look in your craft space!
Ink Blending Tool Handles and Domed Foams
If you're an inky crafter or a huge fan of ink blending, you've probably amassed quite a large assortment of ink blending tools, brushes, handles, foams, and like accessories. For a fabulous and fashionable display of ink blending tool handles and attached foams, there's nothing more stylish than the 1-ounce ColorCase.
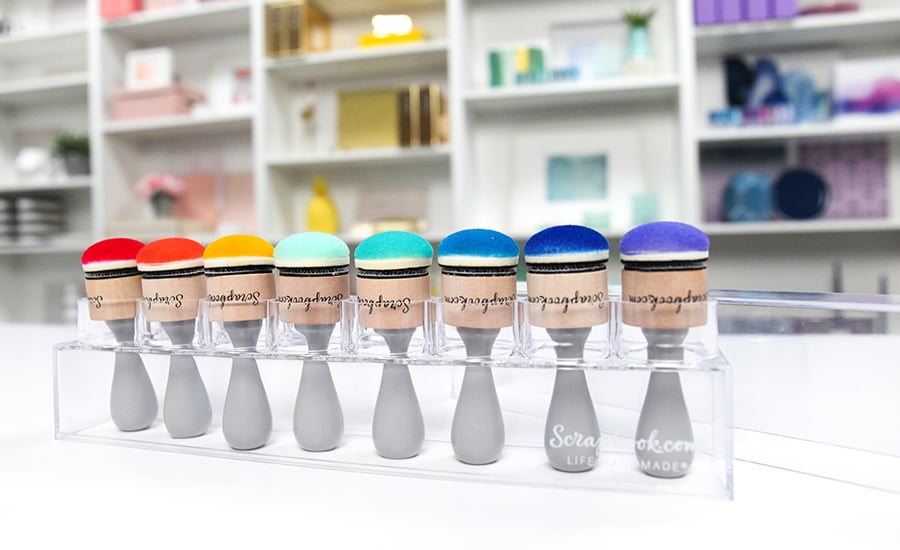 Yes, that same beautiful bottle holding storage device also holds your Ink Blending Tools and Domed Foams! Just look at those 8 handles and coordinating domed foams lined up so beautifully. You can even stack them one on top of the other for holding over a dozen blending handles at once! But what about your huge assortment of foams?
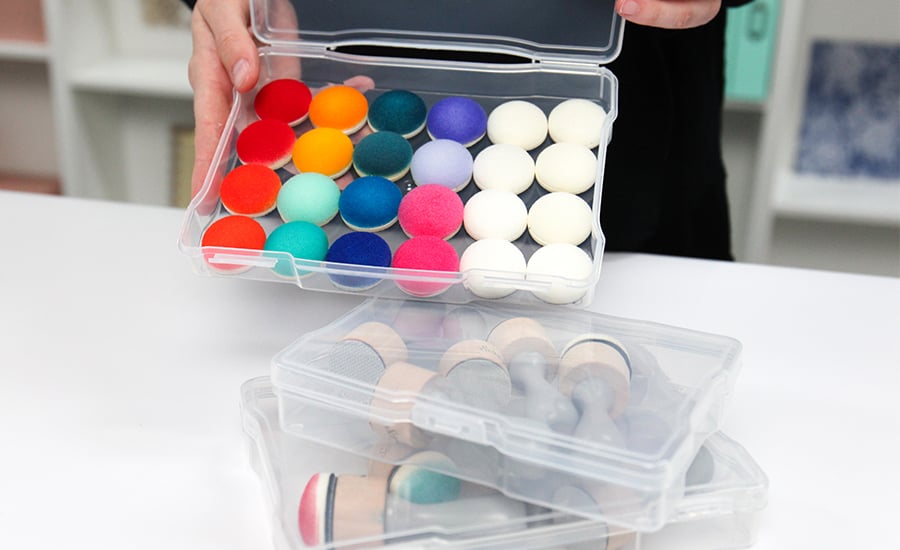 If you like to have a dedicated foam for every color of Scrapbook.com Hybrid Ink, Distress Ink, Distress Oxide, and more, then you need to stock up on our individual Clear Craft Storage cases. Not only can you fit a few of the handles in there, but with a 5" x 7" case, you can easily fit over 48 domed foams (stacked 2-high) or well over that if you stack them in rows on their sides.
However, you decide to organize your tools, and foams may be moot since you may not be able to put them down!
Photos, Embellishments, Ephemera, and Supplies!
At Scrapbook.com, we are passionate about empowering you to make beautiful, handmade creations. And to do that well, we also need to make sure you're completely organized and ready to craft at a moment's notice. Our Clear Craft Storage Collection* is an incredibly easy, stylish way to get all of your photos, embellishments, ephemera, dies, stamps, and supplies more organized and easy to locate!
*Please note this product has been discontinued.
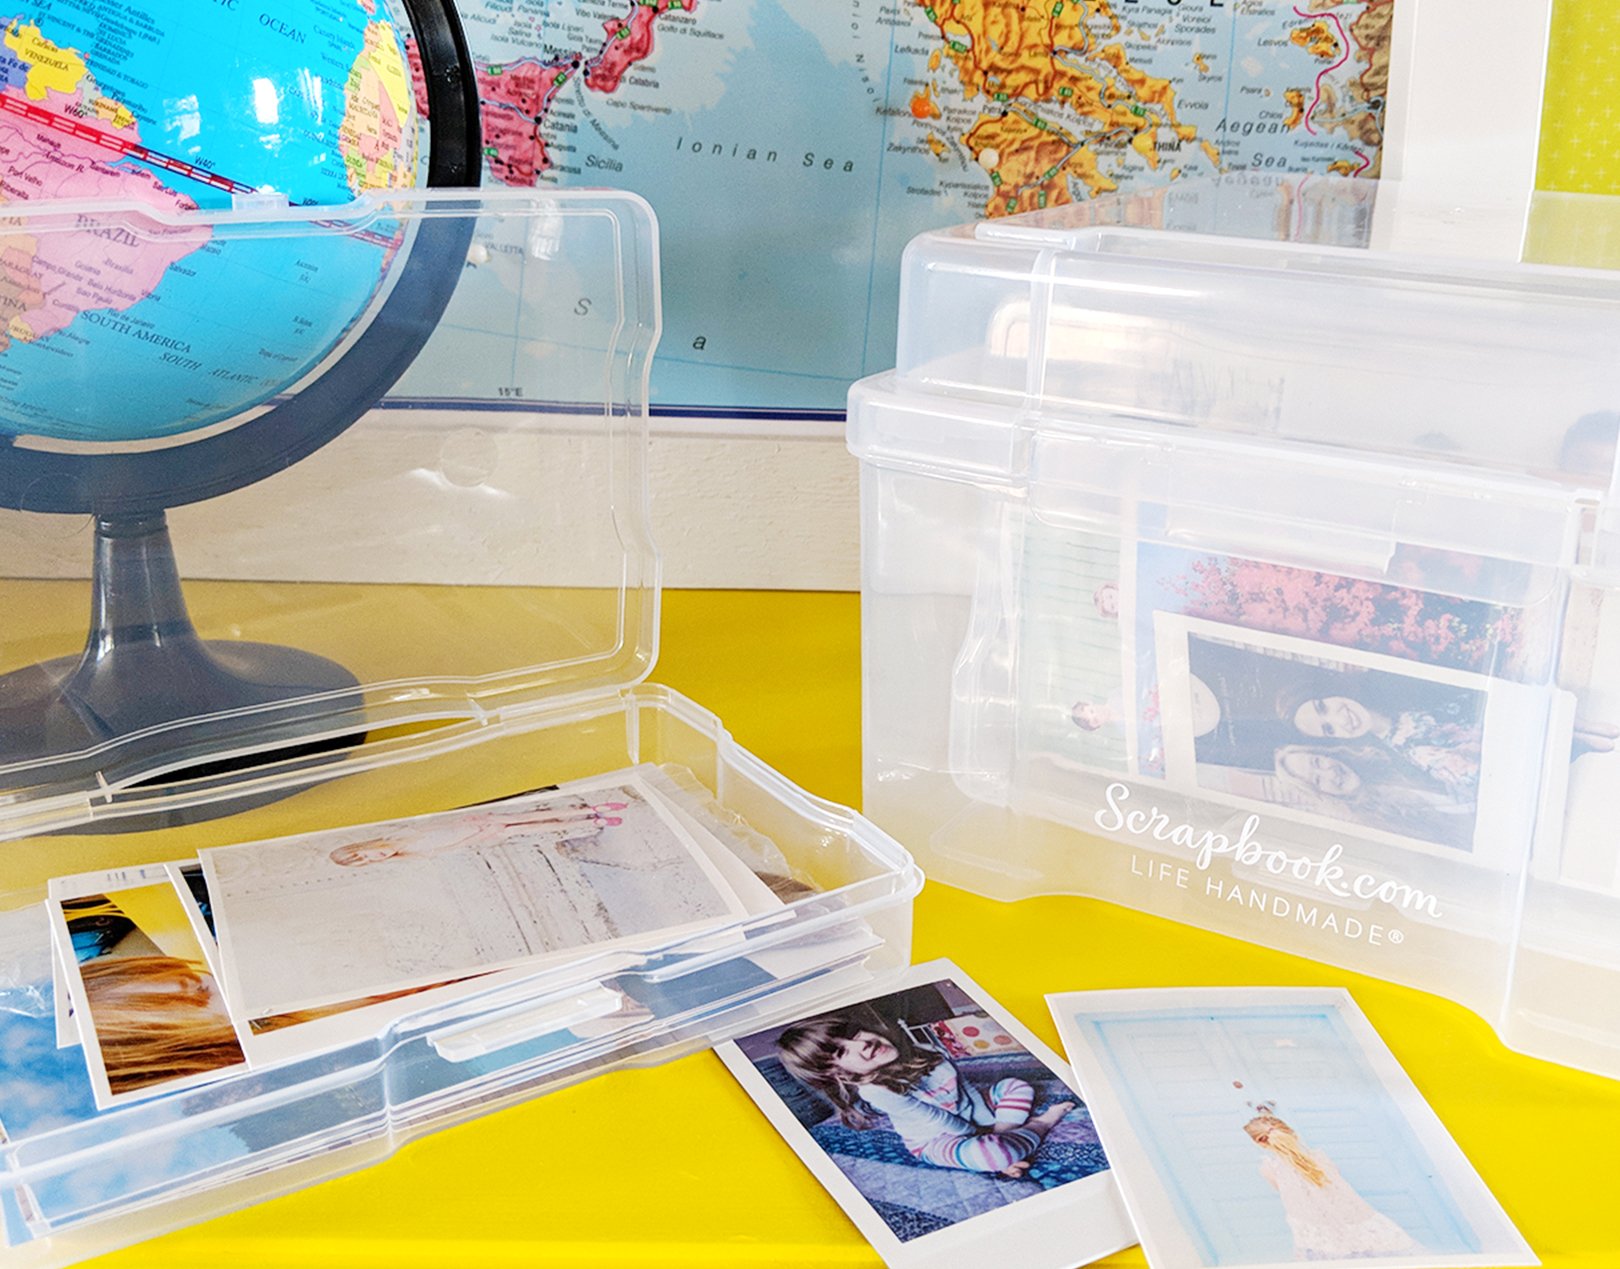 Our Clear Craft Storage Boxes come in three different sizes - and we are so sure you will love ALL of them.
 There's a clear box that has 6 individual 4" x 6" x 1" plastic containers inside it. This is perfect for cataloging and organizing all your standard photos. Each of the inside containers can hold up to 100 photos for a total of 600 photos!
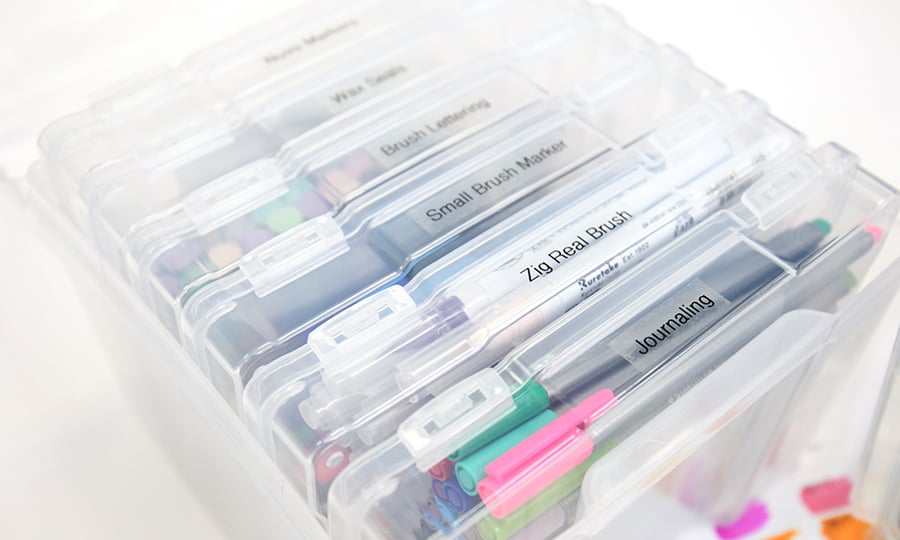 The next step up from there is our 5" x 7" x 1" plastic containers set. This is just like the previous version in just a little bigger size. Our customers have found a variety of uses for this size storage box, like holding clear stamp sets, thin metal dies, embossing folders, and decorative accents.
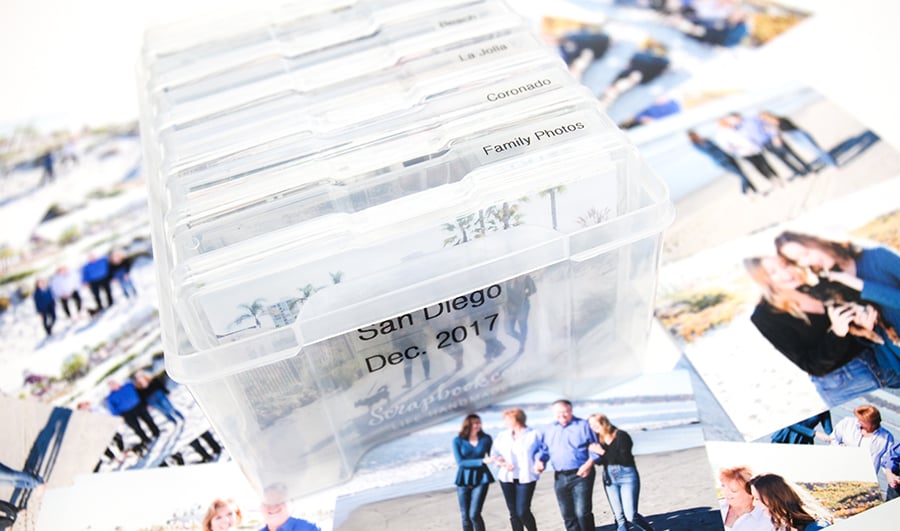
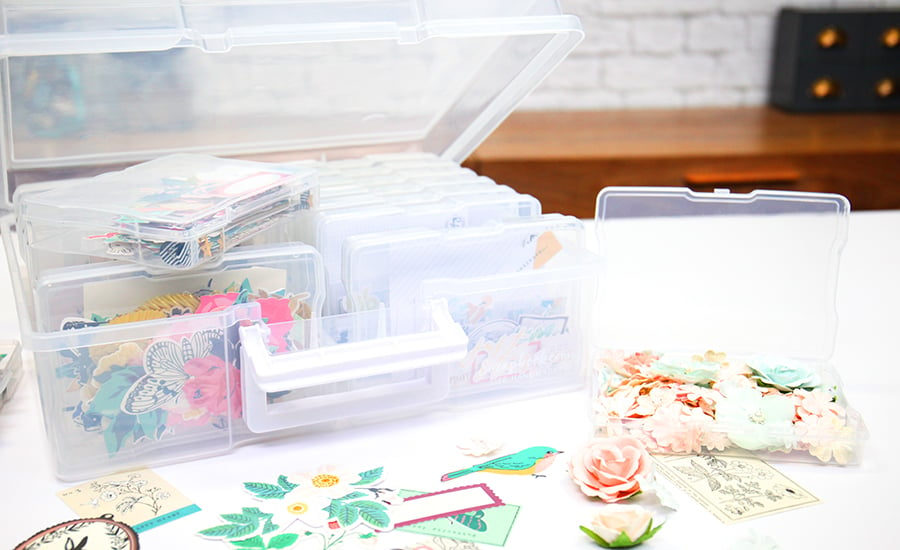 Our biggest clear craft storage is our 5-star rated 17 piece set. This large, portable container has 16 individual 4" x 6" x 1" plastic containers inside to fill with a variety of photos, ephemera, writing utensils, supplies, and anything else you can think of.
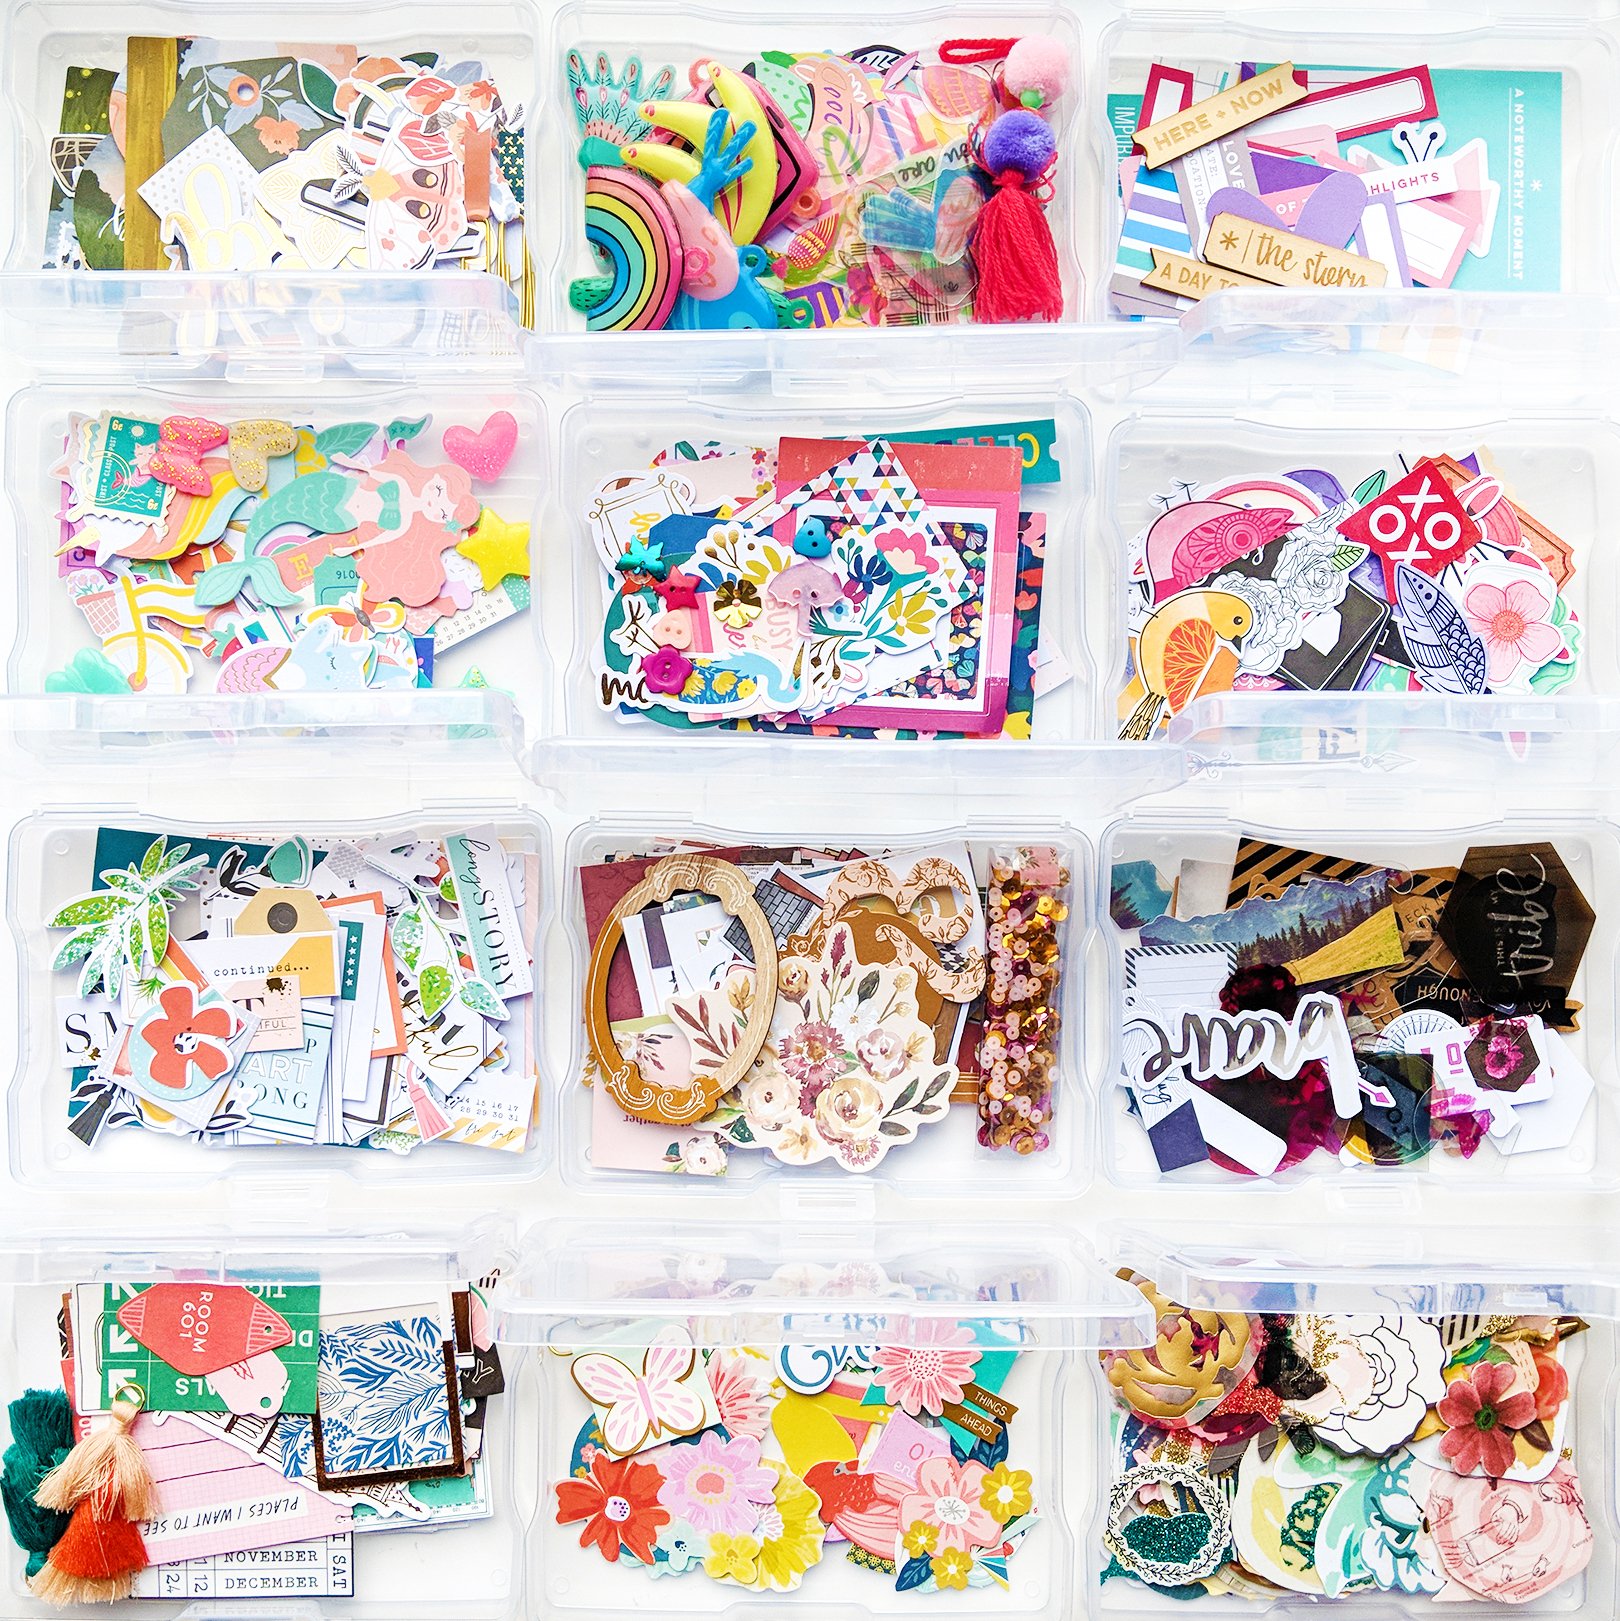 Just imagine how much easier your crafty life will be when you have a place for everything and everything in its place. You can even break out your label maker and label each of the inside containers for themes of ephemera, type of supplies, the color of accents, or destination in the photos.
We hope you've gotten some useful information and tips on keeping your favorite craft supplies clean and organized.
What tried and true cleaning hacks or organizational systems have you discovered that could help out fellow crafters? Leave a comment below to help out a crafty friend!


