FREE Standard Shipping on Orders $69+ with code:
FREESHIPPING

Cheers
Give a Cheer

 Give a Cheer
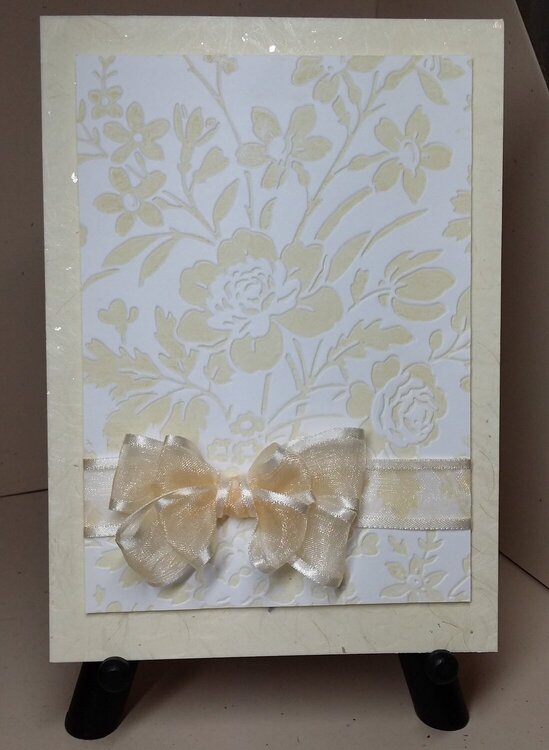
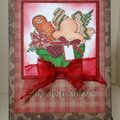
This is a wedding card.
CARD:
5 x 7
Neenah Classic Crest Solar White 110-lb. cardstock (card base)
Mulberry Paper (to cover card base)
Neenah Classic Crest Solar White 80-lb. cardstock (embossed piece)
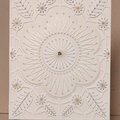
Faux Letterpress Technique (Inking the debossed side of the embossing folder)
Distress Oxide Ink (Antique Linen)
Brayer
Shim
MJ Trim Ribbon (7/8 Sheer Satin Edge, Ivory)
Zutter Bow-it-All
Darice 2mm foam sheet (behind letterpress piece)
It had been a while since I'd used this technique. Applying the ink with the ink pad resulted in a splotchy background. It was much better when I used a brayer. Best of all was using a brayer with Distress Oxide Ink and adding a 110-lb. cardstock shim to the Cuttlebug sandwich.
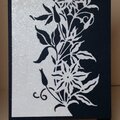
The Mulberry Paper is smooth and a bit heavier than my other mulberry papers. I'm not sure where I got itmaybe from Nora or a sample from Kelly Papers? Maybe it's not even mulberry paper, but that's the best way I can think of to describe it.
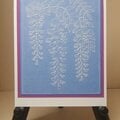
I followed Taheera Atchias tip for attaching a card-size mat to the card base, and it worked like a charm. You place the card in the corner of a score board, add adhesive to the mat, and line it up in the same corner. The workshops I go to almost always have us cover a white card base with colored cardstock, and I can't get the darn thing to line up correctly. I almost always have to trim along the edges. I tried Taheera's tip, and it worked perfectly. I used a Scor-Pal, but this would work in a stamp positioner with two raised sides too.
TFL
Daria
No products have been added to this project.
Thanks for spreading positivity!


December 25, 2017
September 28, 2017
September 25, 2017
September 24, 2017
September 24, 2017