FREE Standard Shipping on Orders $69+ with code:
FREESHIPPING

Cheers
Give a Cheer

 Give a Cheer
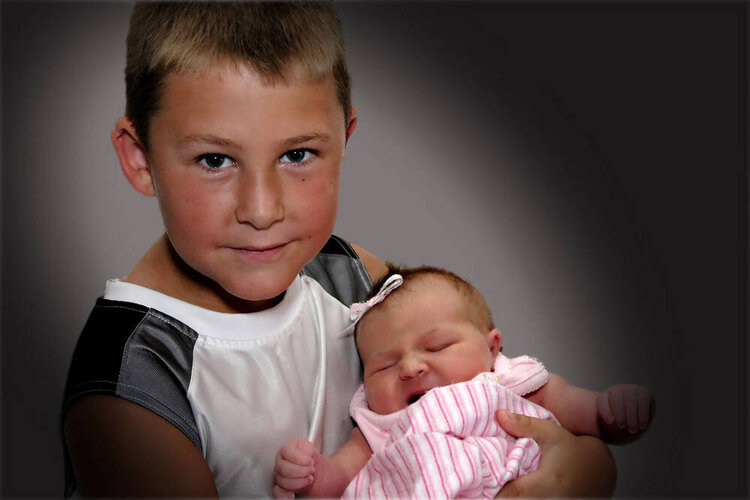
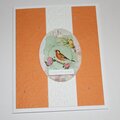
Ok I'm gonna try to spell out how i did this... I'm sorry if I miss a step, but if you try it and it doesn't work right, pm me and i'll try to help. I did all of this in photoshop 7.0
First is a background extraction
I can't explain this as well as you could watch it I think. so here's the instructional video on how to get rid of that pesky background... http://av.adobe.com/russellbrown/ExtractSM.mov
One thing I did do differently is instead of using the pen tool, I used the magnetic lasso.
Then changing the lighting
Flatten your image from the previous step
go to tool palette and chose the elipse tool
Draw an elipse around the area you want to represnt a spotlight.
You can rotate the elipse by going to select -> transform selection-> then on the box you get you can rotate the area by clicking outside the box and when you get a double half circle arrow moving it around until you like what you see.
go to layers -> create new fill/adjustment layer -> hue and saturation -> adjust lightness (this will make the center darker - that's ok) - this creates a layer mask
go to image -> adjustments -> invert - now it's like a spotlight
to soften the edges of the "spotlight"
make sure the mask is selected
go to filter -> blur -> gaussian blur
set the radius so that the edges are as soft as you'd like
Now you can play...
If you select the hue saturation layer, you can adjust the lightness, you can move the area around, you can change the shape just like before with the transform tool,
Happy editing!!!
No products have been added to this project.

Thanks for spreading positivity!


September 15, 2006
August 11, 2006
August 11, 2006
August 05, 2006
August 05, 2006
August 04, 2006
August 04, 2006
August 04, 2006