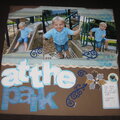
FREE Standard Shipping on Orders $69+ with code:
FREESHIPPING

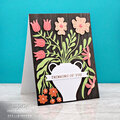
Cheers
Give a Cheer

 Give a Cheer
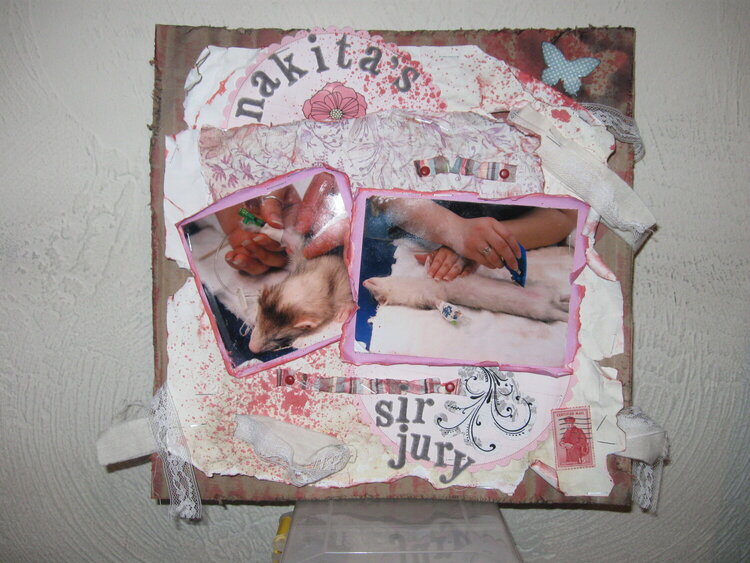
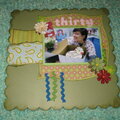
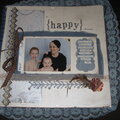
Photos of my ferret Nakita getting prepped for her big spay "Sir Jury". ;) We try not to say surgery or neutered in front of pets, so we say sir jury or tootered. :) Anyway, this is what I can create when I actually take my time on something. I absolutely love how this turned out! This was done for the 12 sketches of Christmas challenge here at sb.com. The challenge was to distress as much as humanely possible LOL. I got very creative for this lo! I'll be hanging it above the ferret's cage.
Here is all that I did to distress this lo~
Paper:
1. I matted the lo onto cardboard. I folded the coardboard so the ridges were more easily visible. I then inked the coardboard.
2. I tore paper along the edges of the lo, as well as the paper strips, and borders of the photos.
3. I inked pretty much everything...all the papers except the two journaling circles.
4. I stained the main lo paper with a tea bag.
5. I stained the bottom left side of the lo with coffee grounds. Tried cinnamon...it smells nice, but didn't give much of an effect. HAHA!
6. I crumbled the main paper into a little ball, then unrolled it and inked it. I then tore the edges of the paper.
7. I then soaked the main piece of paper and got it pretty wet. I distressed a little more by running my fingernails over the wet paper. It turned out pretty cool! I found this out all by accident lol, and liked is so much I did it to a significant amount of the lo.
8. I burned some of the edges of the paper with the lighter. Lots of smells were generated from this lo. ;)
9. I distressed the edges by tearing them and curling them. FYI, if you want to make your page 3D, spraying it with water before wrinkling makes the edges dry hard and crisp, and stay where you position them.
10. I used direct inking over the wrinkled paper and also used a sponge to apply ink around the edges of the coardboard and photo paper.
11. I distressed the edges of the cardboard by running my scissors over the edges. I love it!
12. I used masking in the top left corner of the lo to create a butterfly.
13. I used the inked butterfly to lay over the masked butterfly. :)
14. I also took a wet washcloth and ran it over the lo, however, I think I prefer the fingernail scratching better.
15. This is where I got REALLY creative!!! I had no ink to spray my paper with so I made my own with my son's Koolaid LOL. It worked!!! However, I got a little too excited and accidently sprayed my photo. Lesson learned!
Photos:
1. I took a razor to the edge of the photos to cause a distressed look.
2. I then filed the edges as well, and bent some of the photo back with the nail file.
3. I peeled/curled back the first layer of the photo, exposing the plain white part underneath.
Misc.:
1. I distressed my lace and canvas cloth by pulling out little threads and ripping holes and tearing my lace. I then threaded it through holes I made in the paper.
2. I used NO adhesive on this entire lo. All I used were staples and stickers, and rub ons. :) I stapled pretty much everything.
I think that sums it up. TFL and hopefully you learned something new!
*If you are going to use the Koolaid, just mix it with a little bit of water, so that you have strong color. The more you dilute it with the water, the lighter your color will get. :) TFL!
Oops. Forgot two things. I sanded the butterfly before inking him. I also tried the steel wool thing...didn't care for it too much. It seems to destroy more than it did alter.
No products have been added to this project.
Thanks for spreading positivity!


December 16, 2009
December 15, 2009
December 15, 2009
December 12, 2009
December 09, 2009
December 09, 2009
December 09, 2009
December 09, 2009
December 09, 2009
December 09, 2009
December 09, 2009
December 09, 2009
December 09, 2009
December 09, 2009
December 08, 2009
December 08, 2009
December 08, 2009
December 08, 2009