Thank YOU! It's Customer Appreciation Week!
EXTRA 11% OFF Orders $100+ With Code: THANKYOU
EXTRA 11% OFF Orders $100+ With Code: THANKYOU
Be the first to cheer this project!

 Give a Cheer
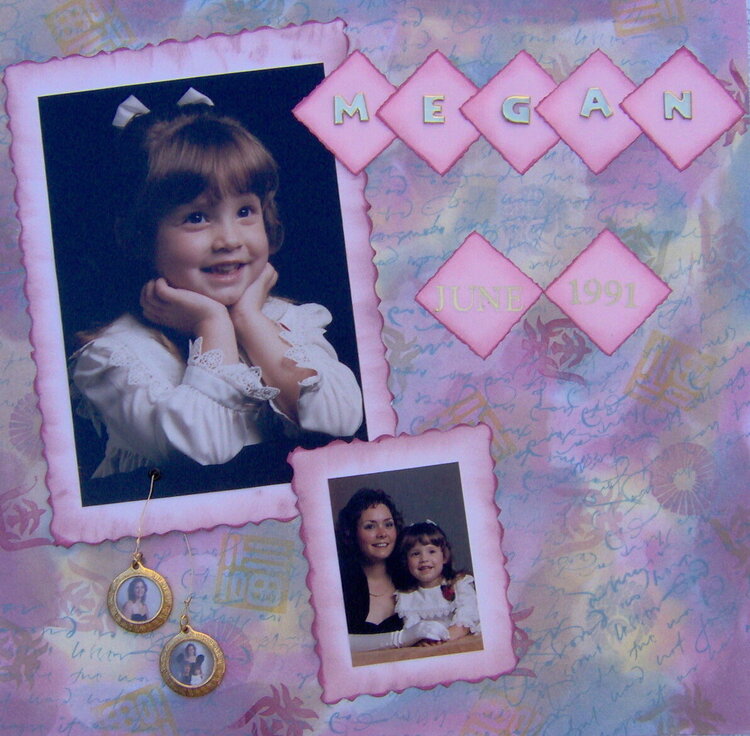
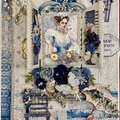
Instructions to make this beautiful home-made patterned paper:
Start with a piece of smooth finish cardstock. Any color is fine; you will not see any of the color of this cardstock when youre finished. Feel each side of the cardstock to see if yours has a smoother side. If it does, use this side. If not, dont worry, it will work anyway. [Note: You cannot use any of the Bazzil textured cardstock, the colors will not blend properly.]
You must use PIGMENT inks. I have only ever used Color Box, Cats Eye inks, and I know they work extremely well for this process. Chalks inks definitely do not work for this technique; they will not blend. [If it helps you to remember which type of ink to use, I always think of slippery PIG (for pigment.) Dont ask me how I thought of that, but it works!
Choose at least 3 (you can use more) complimentary or coordinating ink colors.
Begin using your lightest color first, continuing with the next lightest, etc
saving your darkest color the last application in the next step(s.)
Now, this is not at all an art project [yet], or anything that should be precise. You need to work a little quickly, so dont study where to apply the inks, just do it! Have fun squiggling a 1- 3 [approx.] curvy space, blot on several more spots on a different section of the cardstock, smoosh more on yet another spot of the cardstock.
Do the same exact application process with the next ink color; and then the next ink color, and if you have another ink color, continue this process until your cardstock is covered with assorted ink colors in blotchy application areas.
Using a clean paper towel, rub your cardstock with medium pressure in a circular motion in all areas of the cardstock. If you worked quickly enough, it should all blend together nicely. If you did not work quickly enough, dont worry. Take a slightly damp baby wipe and use this in place of the paper towel to blend your colors. [Note: If you use the baby wipe, you will need to wait several hours for your paper to dry.]
There!, now thats pretty beautiful, isnt it? Ahhhh, but were not done yet!
Chose a stamp that does not have a lot of coverage area on it. Words or saying stamps, or the Autumn Leaves Flourish stamps work VERY well for this part.
I like to use a metallic pigment ink for this part, but you can certainly use another complimentary color thats darker than the rest of the colors on your blended background now.
Stamp the entire 12x12 area using the metallic (or your chosen color) ink. You can stamp an image first and then finish with the metallic if youd like
it all depends upon what look you are trying to achieve. Voila! I have faith that your page is now gorgeous! Dont you think so???
Believe me when I tell you that if you have these supplies, you should definitely try this technique. Its a lot of fun, and you can make BEAUTIFUL paper in any color that you need!
If you have any questions, please feel free to PM me! Im going to look through my gallery to add Pigment ink into my descriptions so you can find them if youd like to see more examples of this beautiful technique. I should at least 3 other layouts in my gallery and each & everyone are so different.
Have a fun & creative day,
Tracey
No products have been added to this project.

Thanks for spreading positivity!