
 Vintage Thank You Card%20-%20Scrapbook.com)

Storage & Organization up to 60% OFF!
Plus, a FREE Gift! | Details Here.
Plus, a FREE Gift! | Details Here.


 Give a Cheer
SUPPLIES:
Cricut and Fabulous Finds Cartridge
Spellbinder Die Cuts: Eyelet Pendant, Circles, Scalloped Circles, Deckled Edge
Glossy and White Cardstock
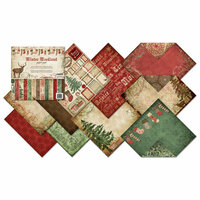
Creative Imaginations Winter Woodland Paper Pack
Stampendous Thank You stamp
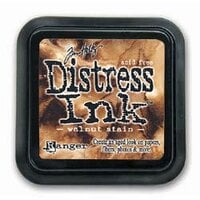
Old Paper, Walnut and [Pine Needles Distress Ink & Distressed Embossing Pwdr]
Rubbing Alcohol and Cosmetic Wedge
Tsukineko Walnut Ink: Eucalyptus Spray Ink
Pop Dots
Ribbon
Black StazOn
The Music Notes were found online by searching for "online sheet music"
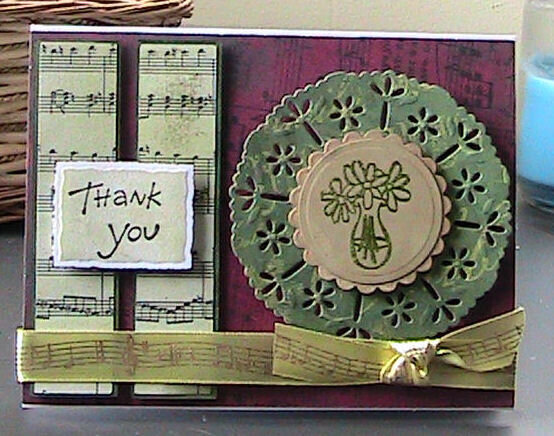
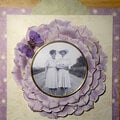
I wanted to do a vintage card so I used a sketch from splitcoaststampers (SC239).
The dark red background paper has some music notes on it so I went online to find sheet music that I could print out on White Cardstock and distress. After cutting them out with my Cricut, using the Fabulous Finds Cricut Cartridge, I used my Ranger Ink Applicator Tool and Old Paper Distress Ink and ran it across the notes. I matted them onto white cardstock that I inked with Pine Needles Distress Ink & Walnut Distress Ink. I raised them with Pop Dots. Just a note about adhesives....they don't like to stick to anything with Distress Inks on them. Probably because they're water-based so put something heavy on it and let it sit for a few minutes.
I cut out a Spellbinder Eyelet Pendant. On top of it is a scalloped circle (also from Spellbinders), made out of Glossy Cardstock, that I inked with Tsukineko ink. To do that I took my cosmetic wedge and put a small amout of rubbing alcohol on it. and then sprayed the Tsukineko ink on it and dabbed it on the Glossy Cardstock. I did the same for the piece on top of it with the vase and flowers. I heat embossed that image with Pine Needles Distressed Embossing Powder. I raised each of those pieces with Pop Dots
Note: IF you DO use the Tsukineko ink do the heat embossing FIRST
Next, I cut out a piece of white cardstock and used the Deckled Edge die cut on it. When stenciling I used Old Paper Distress Ink. I inked the edges with more Walnut Ink Distress Ink and added Thank you to the front. I raised it with pop dots.
Lastly, the ribbon was added, which has music notes on it. The way I add ribbon to cards is to take 1 strip of ribbon. You need enough to wrap around the edges. You want to give yourself a little slack so don't wrap them around the edges as tight as can be. Then cut another long piece, 6-7 inches, and put it under the 1st piece, like a cross, and tie a knot....cut the ends if you wish....and your done.


Thanks for spreading positivity!


June 12, 2018
April 13, 2010