

Thank YOU! It's Customer Appreciation Week!
EXTRA 11% OFF Orders $100+ With Code: THANKYOU
EXTRA 11% OFF Orders $100+ With Code: THANKYOU


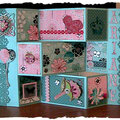
 Give a Cheer
SUPPLIES:
Heidi Swapp Invisibles, Dots (Background Paper)
My Minds Eye Paper
Coredinations, Vintage Collection Serene
Coredinations, Core Essentials, Asparagus
Making Memories Chipboard Circles
Cuttlebug
Cuttlebug Embossing Folder, Spots and Dots
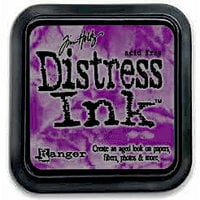
Distress Inks: Dusty Concord and Peeled Paint
Rangers Ink Applicator Tool
Making Memories Chipboard letters
Clear Embossing Powder
Versamark Watermark Ink Pad Dazzle
Sandpaper
Colorbox Metal Words
White Acrylic Paint
BACKGROUND:
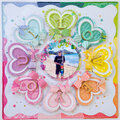
I created the background with Dusty Concord Distress Ink. Its called the Invisibles. Its like using clear embossing powder that acted like a resist.
CIRCLES:
First, I painted them white with regular white Acrylic paint. Otherwise no matter what color ink you put on the chipboard it will be VERY dark. Then I colored it with Peeled Paint Distress Ink. I then took my Cuttlebug Embossing Folder (Spots and Dots) and ran it through. Then I took the same ink pad and put it face down on the embossed image.. Move it back and forth until the area is covered with ink. It will be a little darker then the first application of ink.
To finish them I sealed each with clear embossing powder. I did that so the ink would stay put and not rub of. Acrylic paint can create a resist all by itself. It also makes a nice shine.
LETTERING
The chipboard letters were white to begin with so I just added Peeled Paint to them. I also clear embossed each of the letters.
I attached the letters to a strip of striped paper with a scalloped border above and below it. I sanded the scalloped edges.
I attached all the pieces including the last 2 elements which are the 2 metal words
.Remember and Cherish


Thanks for spreading positivity!


March 03, 2011