
%20-%20Scrapbook.com)

Thank YOU! It's Customer Appreciation Week!
EXTRA 11% OFF Orders $100+ With Code: THANKYOU
EXTRA 11% OFF Orders $100+ With Code: THANKYOU


 Give a Cheer
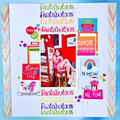
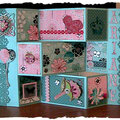
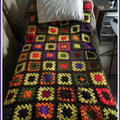
This is my Thinking Inking Inspired Layout. There is a video from Jennifer McGuire, C/O Two Peas in a bucket, on youtube. I did change many items to the supplies that I had. The video is called Thinking Inking Favorites Part 3 Everything.
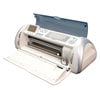
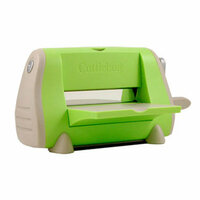
I first created a cut file using the Cricut Design Studio. After I arranged the rectangles/squares I cut them all out using the Fabulous Finds Cricut Cartridge.
Like the video, I used Water color paper. It absorbs better than regular cardstock. I wont list it in the supply lists. The squares sit on (dark) aqua dots cardstock.
Starting at the top row left corner
SQUARE 1:
SUPPLIES
-K and Company, Memories
-Flower punch, 1, 1.5 and 2 inches
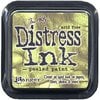
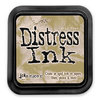
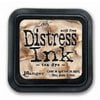
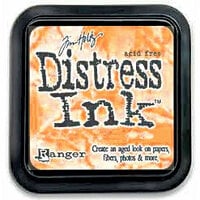
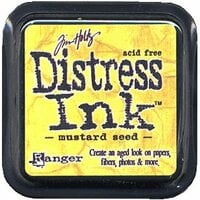
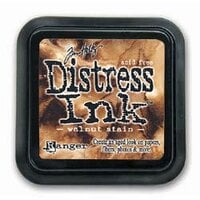
-Distress Inks: Broken China, Mustard Seed, Spiced Marmalade, Tea Dye, Walnut Stain
-Grungeboard
-Cuttlebug Embossing Folder Textile Texture
First, I started by stamping the Friends cling stamp on the Watercolor paper. Then I took my Broken China and Walnut Stain distress inks and shaded the paper. Then I ran the ink pads and ran them along the sides to give it a nice crisp edge.
The Grungeboard was next. I actually had that done already. I was going to use it, in the past, but I didnt. It just happened to be the colors I needed. Originally what I did was take the Broken China and Mustard Seed distress inks and cover the Grungeboard. Then, I ran it through the Cuttlebug. Its important to color it FIRST because you wont get in the crevasses if you do if after. Now to bring out the embossed design I took the distress inks and pressed them directly on the Grungeboard. Rub the ink pads back and forth.
Next, I added the Gift tag made by K & Company.
To finish, I punched 3 flowers out. One of each size. I colored them with several Distress Inks.
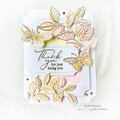
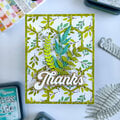
SQUARE 2: (covered in the 2peas in a bucket Youtube video)
SUPPLIES
-Hero Arts, Three Ferns (Rubber stamp)
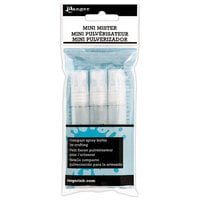
-Mini Mister
-Perfect pearls (white)
-Water
-Distress Inks: Peeled Paint and Pine Needles
Very easy
I took my Ferns stamp and covered it with Peeled paint distress ink (because its the lighter of the two.) Then I added Pine Needles to the outer edges of each fern. Then I took my mini mister, which was filled with water and Perfect pearls (white) and spritzed the stamp 3 times. Then I pressed it on the paper. After everything dried I sprayed a couple more times.
SQUARE 3:
SUPPLIES
-Grungeboard
-Cuttlebug Embossing Folder, Argyle
-American Bahama Blue Acrylic Paint
-Broken China Distress Ink
-Cuttlebug Butterfly die cut
-Flower soft
-Glossy Accent
-Ribbon
First, I took the Grungeboard and colored it with Broken China distress ink. Then I ran it through the Argyle Cuttlebug Embossing folder. After that, I ran the same ink pad on the embossed areas.
I added a Grungeboard butterfly and added flower soft to the top. I didnt have the right adhesive so I put Glossy Accents on top of all of it.
Lastly, was the ribbon also added with Glossy Accents.
SQUARE 4:
SUPPLIES
-Chipboard (entire house)
-White Paint Dabber
-Distress Inks: Tea Dye, Walnut Stain, Mustard Seed, Spiced Marmalade, Peeled Paint, Pine Needles
Rubber Stamps: Tree is Splendor 3977H by Penny Black
Sun is by Inkadinkado 95995
Grass is Prairie Grass by Rubber Stampede
Glossy Accents
This square was totally spontaneous. I had no idea what to do until I got to this square. I had a chipboard house that just so happened to be the perfect size. I took Walnut Stain distress ink and covered the entire base of the house. Then I took the roof and the door and covered them with the white paint dabber. Then I added Tea Dye distress ink to them. I put that to the side to do the background.
So, for the background I colored the sky like a sunset to match the rest of the colors in the layout. I added the sky stamp. Then I added the grass with Peeled Paint and Pine Needles. Then I added the tree.
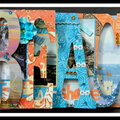
SQUARE 5:
SUPPLIES
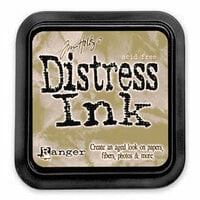
Distress Inks: Old Paper, Broken China and Walnut Stain
-Tim Holtz Alphabet Mask
-Grungeboard
-Cuttlebug Embossing Text Script
First I started with covering the paper with Old Paper distress ink. Then I added the Alphabet masks. Then I covered it with Walnut Stain. Then I peeled the letters off.
Next, I added the Grungeboard arrow. I colored it with Broken China then embossed it, then put the same ink pad directly on the embossed area. Rub it back and forth until its as dark as you want it. I attached it with Glossy Accents.
SQUARE 6:
SUPPLIES
-Hero Arts, Three Ferns
-Mini Mister
-Perfect pearls (white)
-Water
-Distress Inks: Peeled Paint and Pine Needles
SAME AS SQUARE 2
(Bottom row, left corner)
SQUARE 7:
SUPPLIES
-American Bahama Blue Acrylic Paint
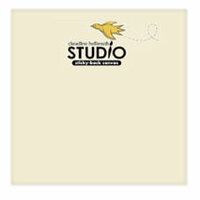
-Sticky back Canvas
-Perfect pearls (copper color)
-Grungeboard hearts
-Mini mister with water
-Non stick sheet by Ranger
-Heat gun
This is one of the squares that is the same as the YouTube video. Except, for the hearts. What I did was paint the canvas. Then you fold it. You will need a 12 inch length piece of canvas. Keep folding it until the watercolor paper is covered. The only way to get the folded canvas to stay put was to put glossy accents in each fold. Its not easy when theres paint there. You have to hold it in place for a minute or so. I had to leave a few spaces open for the hearts.
For the hearts, I took Perfect pearls and scooped some out on my non-stick craft sheet and sprayed the water next to it. Then I joined the two with a paint brush. Then I brushed it onto each heart. I didnt want to wait for them to dry so I used a heat gun. That gave it a texture because the perf pearls started to bubble. I added them with Glossy Accents. Pop dots just werent working. This took the longest to finish. It would take a couple hours to really get the Glossy accents to work. After everything was dry I cut a little off the sides. It didnt hurt it at all. Then I added some gems.
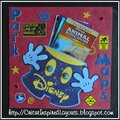
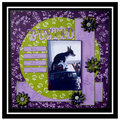
SQUARE 8:
SUPPLIES
-Hero Arts, Cling stamp Friends
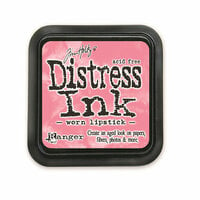
-Distress Inks: Walnut Stain, Tea Dye, Mustard Seed, Spiced Marmalade, Broken China, Worn Lipstick
-Storybook Cricut Cartridge
-Chipboard embellishment
-White paint dabber
-3 flowers punches (.5, 1 and 1.5 inches)
-Gems
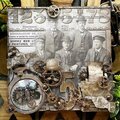
The Sleeping Beauty you see in the photo actually ate the bottom half of this. Shes so lucky she didnt destroy the whole layout. It took 2 days to finish. I did the bottom half over.
I stamped the same Friends stamp. Then covered it with Walnut Stain. I added the Dolly with the Storybook Cricut Cartridge. I colored the letters with Broken China.
Then I painted the parenthesis with the paint dabber. Thank goodness I had 2 to replace the original. I then covered it with Tea Dye ink pad.
To finish, I added the flower punches. I colored them with Distress Inks and added a gem to the center.
For the link to this post please follow this link: http://cricutinspiredlayouts.blogspot.com/2010/11/12-by-12-pet-scrapbook-layouts.html
For more layouts please visit http://cricutinspiredlayouts.blogspot.com/
For cards visit http://cricut-scrapbooklayouts-cards-frames.blogspot.com/
Thanks for looking!
Heather G.

Thanks for spreading positivity!


March 25, 2011
March 07, 2011
March 06, 2011