Happy Holidays Chipboard Christmas Card%20-%20Scrapbook.com)
FREE Standard Shipping on Orders $69+ with code:
FREESHIPPING

Be the first to cheer this project!

 Give a Cheer
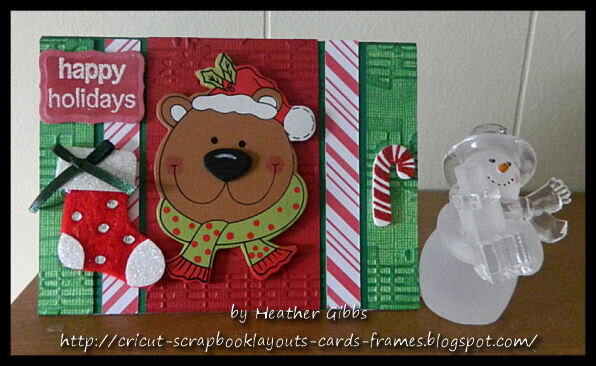
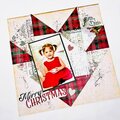
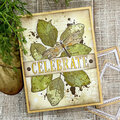
First, I took a standard size A2 white card and covered it with Dark Green Cardstock. I do that with these smaller size card because I want the base of the card to sort of act as the matting for all the pieces of paper. I don't want to make the paper pieces any smaller...which is what I would have to do if I did a matting for each. TIP: One thing i've learned is that when your done tracing the card onto cardstock you have to add 1/8 of an inch to the height. That's because you take up that 1/8 inch when you have to fold the card. If your using The Design Studio just add .125 inch to the height. If your using a ruler the 1/8 mark is the first line after the inch mark.
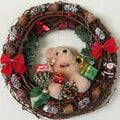
I cut all the paper strips with my Fabulous Find Cricut Cartridge. Then I ran the lighter green cardstock and red cardstock through the Embossing Folder. I used the Ink Applicator Tool to add Pine Needles and Fired Brick ink to th embossed areas. I added the largest item first which is the wooden shaped faceFirst, I took a standard size A2 white card and covered it with Dark Green Cardstock. I do that with these smaller size card because I want the base of the card to sort of act as the matting for all the pieces of paper. I don't want to make the paper pieces any smaller...which is what I would have to do if I did a matting for each. TIP: One thing i've learned is that when your done tracing the card onto cardstock you have to add 1/8 of an inch to the height. That's because you take up that 1/8 inch when you have to fold the card. If your using The Design Studio just add .125 inch to the height. If your using a ruler the 1/8 mark is the first line after the inch mark. which is probably a reindeer. I applied it with Glossy Accents since I needed a very strong adhesive to keep it there. It's a thick piece.
Then I used my Cuttlebug to die cut the Spellbinder Label 8. I heat embossed the Happy Holidays stamped sentiment. I stenciled with Fired Brick ink. Then for dimension I added Foam Sheets under it.
I added a small stocking on the left and a candy cane on the right.
SUPPLIES:
A2 White Card base ( 4 x 5.5)
Cricut Expressions
Fabulous Finds Cricut Cartridge
Cuttlebug
Cuttlebug embossing folder, Musical Notes
Celebrate it: Reindeer Face, Stocking, Candy Canes
Spellbinder Label 8
Fiskars, "Tis the Season"
White Embossing Powder
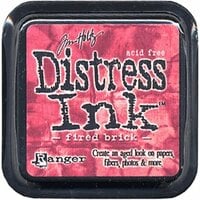
Distress Ink: Pine Needles and Fired Brick
Glossy Accents, Pop Dots
Foam Sheets for dimension
PAPER:
Bazzill Red Cardstock
Core'dinations, Vintage Collection "Kilt Green"
The Paper Studio, Candy Cane Stripes
Thanks for looking today, There is also a Cricut CUT file available at the URL hbelow if you want to download it. It fits an A2 size card which is 5.5 x 4 inches. http://cricut-scrapbooklayouts-cards-frames.blogspot.com/2011/09/download-pdf-and-cut-file-here.html

Thanks for spreading positivity!