Thank YOU! It's Customer Appreciation Week!
EXTRA 11% OFF Orders $100+ With Code: THANKYOU
EXTRA 11% OFF Orders $100+ With Code: THANKYOU
Be the first to cheer this project!

 Give a Cheer
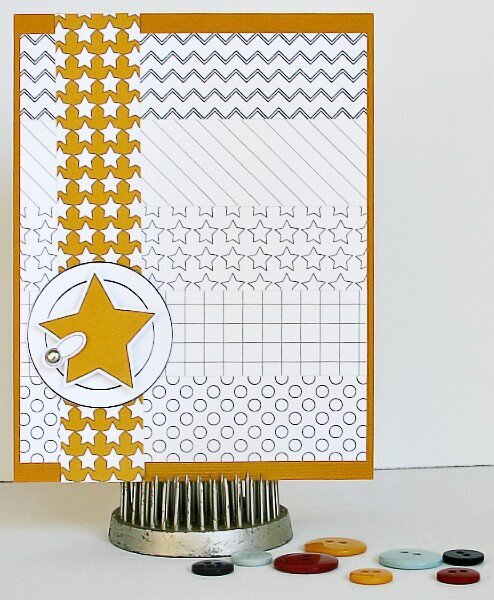
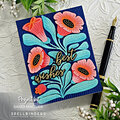
Hi Peas! I created this card for our Stamping A to Z [twopeasinabucket.com] Event. I just love stamping, whether it be with ink pads or with digital files. For this card, I used several digital kits.To create this card, create 2 new files in Photoshop, one that measures 8.5x11“ (300 dpi) and the other the size of your card face (mine is 4.25x5.5” also at 300 dpi). The letter sized file is to place all of the elements that you want to print. The card sized file is to plan your card (sizing is important). On the card file, create 5 rectangles (with the rectangle tool - each on a new layer) that measure 4x1“. Align them as shown on my finished card. Next, choose your papers, bring them in and clip (ctrl+g for pse or ctrl+alt+g for cs) them to each rectangle. Adjust the size of your paper and position to your liking (remember to hold down the shift key to keep your proportions while transforming). Create a new layer and with the rectangle tool, make a new rectangle that measures 1x5.5”. Place as shown in my finished card. Clip a paper of your choice to it (mine is the yellow star pattern).Next, you will bring in any of the elements that you want to use. I brought in a star, a photo turn and a circle stamp. Position and resize as desired. Now, you can print the card file right as it is or if you like more dimension, you can drag all of your pieces onto the letter sized file. Print, cut and assemble.
No products have been added to this project.

Thanks for spreading positivity!