Storage & Organization up to 60% OFF!
Plus, a FREE Gift! | Details Here.
Plus, a FREE Gift! | Details Here.


Be the first to cheer this project!

 Give a Cheer
These are for Jan's Stamp N Dash Challenge. http://www.twopeasinabucket.com/mb.asp?cmd=display&forum_id=22&thread_id=3279280 [twopeasinabucket.com]
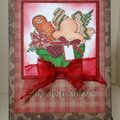
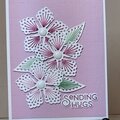
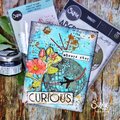
This month's technique is the Inlay Technique–something I've been thinking about trying out for quite some time. Thanks, Jan, for the incentive. I love the way these turned out.
Last night, on my way to bed, I decided to just pop into the craft room and try to find a way to only partially cut an image so that it would fit on an ATC. That didn't work out at all. However, the next thing I knew it was almost 2am, and I had two sets of ATCs finished. The only die I could find that would work was the same one Jan used on her sample ATCs.
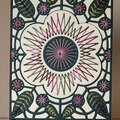
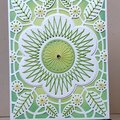
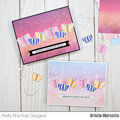
This morning I got to thinking about the original Cuttlebug dies I had spent lots of coupons on and had never even used because they are, guess what, small. The last set scanned was made with Cuttlebug Wonky Rectangles. They aren't finished, but I thought I'd include them here anyway. It makes me dizzy to just look at them. I think it might have been better to have left one part of the image without a design. I'm not sure what I'll do with those. ETA: I finished them for better or worse (last scan).
Details:
Sets 1 & 2:
I found pieces of cardstock that I had left over from another project.
Unknown cardstock
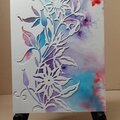
Golden Fluid Acrylics–(darker bkg.)Micacaeous Iron Oxide, glaze of Phtalo Green, blotted off with newsprint; (green bkg.) I'm not sure what I used.
Fun Stampers Journey Script
Rangers Archival Ink, Jet Black
Sizzix Sizzlits Branch and Leaves die
Barbara Trombley's Art Glitter Sticky Paper
Swarovski Rhinestones, SS5
Ranger Inkssentials Matte Accents
On the pieces with the leaves, I placed the leaves before adding the adhesive backing to hold them in place. The Sticky Paper worked great because it allowed me to lift and adjust the pieces. For the last set, it was easier to put the Sticky Paper on the frame before adding the other pieces. After assembling the pieces, I ran them back through the Cuttlebug to press them together completely.
I added the tiny Swarovski rhinestones with the Matte Accents. I think they discontinued that product just when I had discovered it and thought I'd found my new favorite glue. Since it's matte, it doesn't leave an obvious shiny blob if it gets away from you.
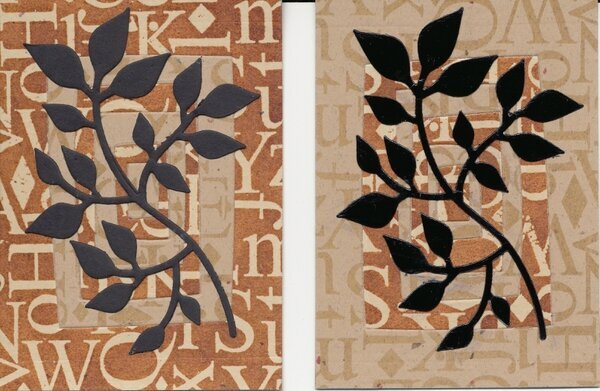
Set #3
I also had these background pieces in my stash.
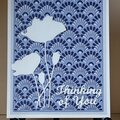
Darker Background–Batik Resist Technique:
Bazzill confetti cs
Hampton Art Stamps Alpha Collage background stamped with Versamark and heat embossed, sprayed with Walnut Ink Antiquing Solution by Tsukineko, and then ironed between sheets of clean newsprint.
Lighter Background–heat embossed:
Kraft cardstock
Versamark ink
Clear Embossing Powder
ETA: I thought I'd relegate that busy pattern to the background by adding a focal image. Maybe I made them even busier? I added the Sizzlits Branch and Leaves die cuts, matte black on the primarily batik resist and glossy black (edged with black Tombow Marker) on the primarily heat embossed background.
TFL.
Daria
No products have been added to this project.


Thanks for spreading positivity!