Livestream Party!
Join us today at 9:00am PT / 12:00pm ET | Details Here.
Join us today at 9:00am PT / 12:00pm ET | Details Here.
Be the first to cheer this project!

 Give a Cheer
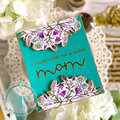
This card is for Cindi's Christmas All Year, February Editionhttp://www.twopeasinabucket.com/mb.asp?cmd=display&forum_id=22&thread_id=3271690 [twopeasinabucket.com] and to provide another sample for my Winterfest Challengehttp://www.twopeasinabucket.com/mb.asp?cmd=display&forum_id=22&thread_id=3272390 [twopeasinabucket.com]
Cindi, I'm so glad that you are offering your challenge again this year. It helped tremendously last year.
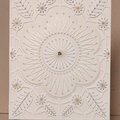
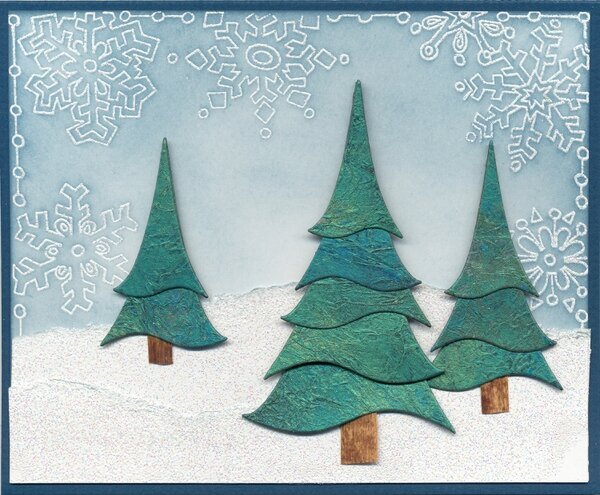
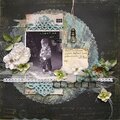
As always, you need to use your imagination to see the soft sheen that the mica powders give to the trees. It really is very subtle and pretty. Also, the embossing powder that I used contains some glitter.
CARD:
5 3/4 x 4 3/4
Bazzill cardstock (base)
Neenah Classic Crest Solar White cardstock (everything else)
BACKGROUND:
Judikins (copyright Paula Best) stamp
Versamark inkpad
Judikins Embossing PowderFrosted Twinkle
Distress InksStormy Sky, Weathered Wood
I applied the ink lightly with the TH applicator, stamped and embossed the image, added more ink to make the image stand out more, and wiped off excess ink with a soft cloth.
For the snowbank, I just tore cardstock, covered it with Versamark ink, heat embossed it, and used the ink applicator to apply a very small amount of Weathered Wood to the edges.
TREES:
Dees's Distinctively Chrismas Stacker Tree Dies
Textured Pearls Technique (learned from the Technique Junkies Newsletter, Dec. 2006; See directions below.)
USArtQuest Perfect Paper Adhesive, Matte
White tissue paper
Mica PowderDreamweaver's Metallic FS (Ivy Garden, Forestry) and Pearl Ex (Turquoise)
Best Creations 3D Foam Tape (actually tiny squares)
Scotch Permanent Mounting Tape
Scotch ATG gun
The tree trunks are pieces of paper thin wood that I salvaged from old Christmas cards. They started out life as part of a Nativity Scene.
When I assembled the trees, I used foam tape at the tops of all the bottom layer of trees to make up for the difference in depth between the snowbank and the sky. Then I used foam adhesive only on the second layer of the largest tree. After that, I used the ATG gun but I didnt' glue down the bottom edges. I didn't want to make the tree too thick by adding foam between all of the layers.
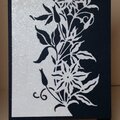
DIRECTIONS FOR TEXTURED PEARLS TECHNIQUE:
(See the challenge blog for more samples, http://www.twopeasinabucket.com/userblogpost.asp?id=74750.) [twopeasinabucket.com]
Supplies:
Dark cardstock
White Craft Glue (Elmers, Perfect Paper Adhesive, etc. ?-something that will dry clear)
White Tissue Paper
Mica Powders (Pearl Ex, Perfect Pearls, Metallic FX are some brands.)
Brushes
Directions:
1. Trim a piece of dark cardstock to the size you want for your project. Pour out about a 1 ½-inch circle of glue onto a craft sheet. Brush the glue over the cardstock.
2. Tear or cut a piece of tissue paper larger than the cardstock you?re using. Ball up the tissue in your hand to create wrinkles and open it back up without smoothing out the wrinkles. Place the tissue over the cardstock and gently press it down into the glue with your fingertips. It helps to start in the center and work your way out unless you want some larger creases. Then use a brush to make sure it is adhered to the cardstock. You may need to add a bit more glue.
3. Use a clean, dry brush to flick two or three different colors of mica powder over the tissue paper. If you overlap the colors, they?ll all mush together; if you keep them separate, they will be distinguishable on the finished piece.
4. Set it aside to dry. The glue will set the mica powder. When it?s dry, cut away the excess tissue paper.
No products have been added to this project.

Thanks for spreading positivity!