FREE Standard Shipping on Orders $69+ with code:
FREESHIPPING


Cheers
Be the first to cheer this project!
Give a Cheer
Be the first to cheer this project!

 Give a Cheer
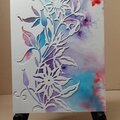
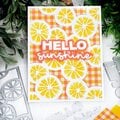
I've been admiring the beautiful microfine glitters for quite a while now. This is the first time I've used them. I've slowly been collecting different colors of glitter, but I used only one color on these cards.
I found some very helpful video tutorials for using outline-type stickers here: http://www.imacrs.com/videotutorials.htm [imacrs.com]
Scroll down a bit to find a series of videos with some very good tips for handling and using this type of sticker.
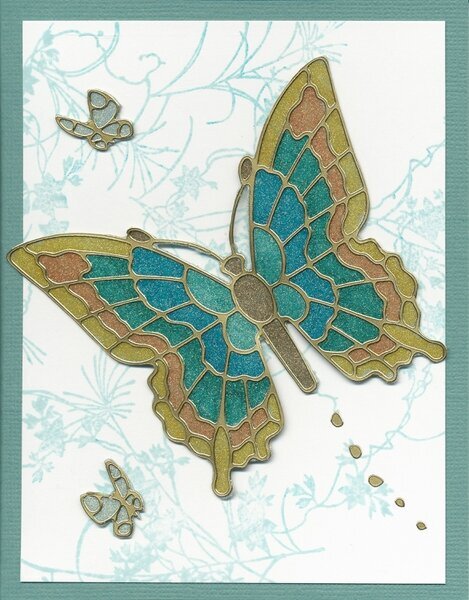
You are going to have to imagine the tremendous sparkle on the butterflies; it doesn't show up on the scans.
CARDS:
4 1/4 x 5 1/2
Bazzill cardstock
Neenah Classic Crest Solar White cardstock
Spellbinders Nestabilites Deckled Rectangles, Large (Cards 2 & 3)
Sizzix, Tim Holtz Alterations Texture Fades, Retro Circles (Card 3)
Starform Outline Stickers (Thank you, Nora.)
Elizabeth Craft Designs Silk Microfine Glitter, Warm Diamond
(This one has too many gold flecks for my taste. It's beautiful after coloring it, but I didn't like the overwhelming gold sheen it left on the aqua cardstock so I cut out the butterfly. It was better on the white cardstock.)
Glitter Ritz Opaque Micro Fine Glitter, White (frame on second card, mat and butterfly on third card)
(This glitter has a subdued shine, it's not very sparkly. Next time I'll try the Transparent Warm Highlights Glitter.)
Prismacolor Markers (all cards)
Bic Marker, Hot Aqua (first card)
Sookwang Adhesive
Glue Dots
Best Creation 3D Foam Tape
ATG Gun
Sakura Quickie Glue Pen (to attach the rhinestones on 2nd card)
I placed the Sookwang adhesive sheets onto cardstock. (Don't do this if you want to make stickers.) I then removed the top backing from the sheets and placed the outline sticker on the adhesive. Then I applied the microfine glitter. I burnished it a lot with my finger before coloring with the alcohol-based markers.
When finished, I cut out and mounted the butterflies onto Cards 1 & 2 with small Glue Dots on the body and foam squares on the wings near the bodies. I used a paper stump to add dimension to the rest of the wings. They stand up very well, but that doesn't show too much in the scan.
For the third card, I die cut the butterfly with a Nestabilites die; I trimmed the left-over frame and used it on the second card.
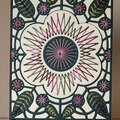
CARD 1:
Background Stamp Stamp Out Cute Silk Screen, Bkg. 85
Adirondack Lights Dye Ink, Aqua
Alcohol-Based Markers (from the inside out:
bodyPC Light Umber
PC Light Aqua
Bic Hot Aqua
PC Aquamarine
PC Burnt Ochre
Yellow Ochre
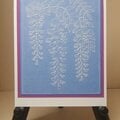
For the small butterflies, I just placed the outline stickers directly on top of the left-over glittered cardstock. The trail behind the butterfly came from negative pieces left over after removing the outline stickers.
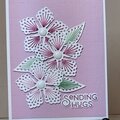
CARD 2:
FrameSpellbinders Nestabilities Deckled Rectangles, Large (leftover from 3rd card)
Swarovski Flat Back Rhinestones, Crystal Copper, SS16
Sakura Quickie Glue Pen
Prismacolor Markers (from the inside out)
bodyLight Umber
Spanish Orange
Burnt Ochre
Yellow Orange
Pale Vermillion
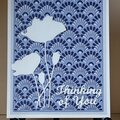
CARD 3:
Embossing FolderSizzix, Tim Holtz Alterations Texture Fades, Retro Circles
Spellbinders Nestabilites Deckled Rectangles, Large
Prismacolor Markers (from the inside out)
BodyLight Umber
Blue Slate
Lilac
Imperial Violet
Copic Marker
B0000(used to blend the other markers)
TFL
Daria
No products have been added to this project.
Thanks for spreading positivity!