Storage & Organization up to 60% OFF!
Plus, a FREE Gift! | Details Here.
Plus, a FREE Gift! | Details Here.


Be the first to cheer this project!

 Give a Cheer
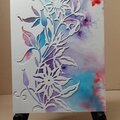
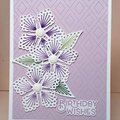
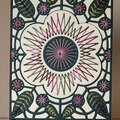
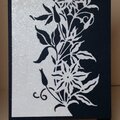
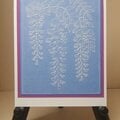
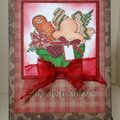
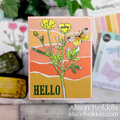
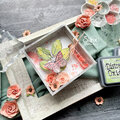
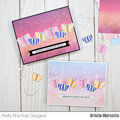
In January, I went to two workshops at Scrapbook Territory in Berkeley, California. Lynell Harlow, owner of Dreamweaver, was the instructor, and Georgia Sommers was also there. Two terrific teachers! This workshop was on Layered Metallica; you can see the sample cards in the last scan above.
CAUTION: EMBOSSING METAL IN AN EMBOSSING MACHINE:
Thank you, Lynell, for this information.
When using an embossing machine to dry emboss metal with metal stencils, you need to keep the stencils away from the top of the sandwich where the machine's roller is so that they will remain flat. Put them face down on the thickest plate. (For the Cuttlebug, that would be the A Plate.) Then put the metal you are going to emboss face down on top of the stencil. You can feel with your fingers and press around the edges to see if you have centered the stencil. Do not tape the metal down. If you do, the metal cannot move, and it will wrinkle up. Next put down the rubber embossing mat or mats. On the top, put the two thin plates. (For the Cuttlebug, that would be the B plates.) Do not use warped plates with your stencils or the stencils will come out warped and be ruined. Lynell suggested buying extra plates to be only used with metal stencils. If you need to add shims (pieces of cardstock), put them above the embossing mat and below the B plates. With this sandwich, the stencil will be protected from the rollers.
Face down = The identifying information engraved on the front of the stencil must be facing away from the metal you are going to emboss or it will be embossed into the metal.
With my Cuttlebug, I used the following sandwich, and the metal embossed beautifully without any splitting of or cutting through the metal:
A plate
Metal Stencil, face down
Metal, face down
Two layers of cushioning (I used two pieces cut from a silicon baking pan. They are thicker than the tan embossing mats we're used to using so I didn't have to use any shims.)
Two B Plates
Supplies:
Dreamweaver metal stencils
Embossing machines, plates, embossing mat, shims
Sheets of colored aluminum from Mercart
Paper stumps
Refiner tool from Mercart
Suede
Color Solution Artist Grade Alcohol Ink and thinner
Precision-Tip Q-Tips
Swifter cloth (to clean off stencils after sanding them)
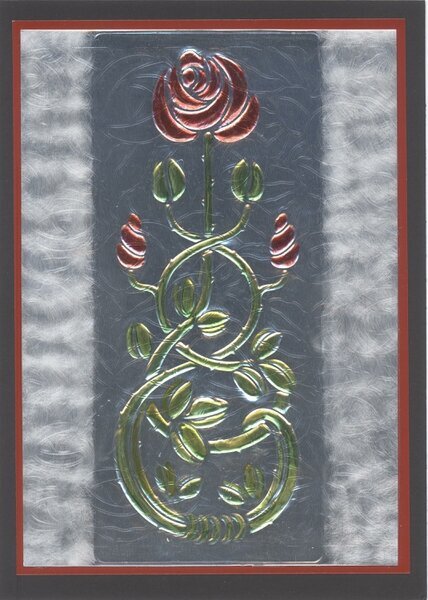
1. For all three projects, we double embossed the metal. First we embossed what would be the background; and then we sanded the raised areas and cleaned off the surface with a piece of Swifter cloth. Then we embossed what would be the focal image. The second embossing flattened the first embossed image. We laid the metal over a piece of suede and used paper stumps to puff out some areas of the embossed focal image. To do this, put the stencil over the design, and put the metal and stencil face down on the suede. Use the stump on the back of the design to puff it out on the front.
There was a refining tool on the table so I refined the entire image on each of my pieces of metal. I went back and forth between using the stump on the back of the embossed image (on the piece of suede) and the refiner on the front of the image (on a hard surface) a few times. Later, we were told to use that tool to refine just around the outer edges. Whoops. Most of the image remained puffed out on the sample cards, but I liked it better when the different parts were all refined.
2. With the stencil in place, use a Q-tip with a bit of thinner or blending solution to remove the color from the focal image. You only need a little bit of solution. If you use too much, it will go under the stencil and remove color from the background.
3. Reposition the stencil, and use alcohol inks and a Q-tip, color the image with the stencil in place.
Lynell recommended Precision-Tip Q-tips; they have pointed tips. We used Color Solution Artist Grade Alcohol Inks.
4. Optional: Use the applicator and alcohol inks to add color to the background areas. See the Thistle card.
On the Cross/Thistle sample, Lynell removed the color from the cross and the thistle; used some thinner/blending solution and a paper towel. Then she colored the thistle with the stencil in place. She removed the stencil and used the alcohol inks to color in the background with a Polished Stone technique. (She used many drops of ink and 3-4 drops of blending solution. Later, she went back over it with blending solution. She also used Precision Tip Q-Tips to add color around the image where she couldn't reach with her blending tool. (The blending tool looks like a pill bottle. It has Velcro on the top and the bottom. Little round pieces of felt fit inside. You can reuse the pieces of felt. Just let them dry.)
Note: When I got home, I worked the metal a bit more using the paper stump and refiner. I did this on all of the images. I noticed a couple of areas that needed more ink so I used Adirondack Alcohol inks with a paint brush. I liked using the brush better than using the Q-Tips.
In class we used a Mercart product to fill in the puffed out areas on the back of the metal so they would not be crushed later. It is a liquid. I used it on the butterfly. Later I had to scrape away some of it since I could see the excess pushing the metal out on the front side. (I missed the demo on how to use this product.) At home, I used Dap Fast N Final Lightweight Spackling. You apply it just like embossing paste and scrape off the excess.
TFL.
Daria
No products have been added to this project.


Thanks for spreading positivity!