Storage & Organization up to 60% OFF!
Plus, a FREE Gift! | Details Here.
Plus, a FREE Gift! | Details Here.


Be the first to cheer this project!

 Give a Cheer
I bought these Dreamweaver stencils after seeing a gorgeous card that was posted here by 1pamperedstamper. http://www.twopeasinabucket.com/gallery/member/442580-1pamperedstamper/1678289-dreamweaver-design-an-ornament/?c=t [twopeasinabucket.com] Isn't it beautiful? Thank you, Pam, for posting your beautiful cards.
Cards:
5 3/4 x 4 3/4
5 1/2 x 4 1/2
4 1/4 x 5 1/2
Cardstock/Paper:
Strathmore 140-lb. cold-press watercolor paper
Judikins Black Glossy cs
Bazzill Gold Leaf cs
Unknown green suede paper
Dreamweaver StencilsPoinsettia and Oval Ornament
Dreamweaver Embossing PasteGlossy Black and Matte Black
Tsukineko's Essential Glue Pad
Finger Daubers
Perfect Pearls mica powderForever Red, Forever Violet or Plum?, Forever Green, Green Patina, Perfect Gold
Dreamweaver Stencil Brushes
Dreamweaver Picasso Shielding Tool
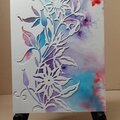
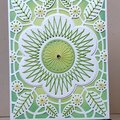
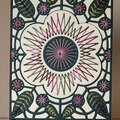
1. For the first two cards, I embossed the poinsettia with Glossy Black E-paste on 140-lb coldpress watercolor paper; for the third card, I embossed with Matte Black E-paste. I wanted to see what difference that would make in the end product. I removed and cleaned the metal stencil and let the paste dry. The glossy paste takes longer to dry than the matte paste.
2. When the paste was completely dry, I put the clean stencil back onto the image and applied the glue from the glue pad with a large finger dauber. I love these things, and the glue washes right out. Then I removed the stencil and cleaned and dried it.
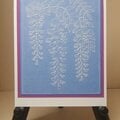
3. I repositioned the clean stencil and applied Perfect Pearls with the stenciling brushes. I also used the Picasso shielding tool and post it notes to mask off areas as I worked. Then I removed and cleaned the stencil and used a soft brush to remove excess mica powder from the image.
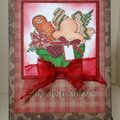
4. I trimmed the watercolor paper and edged it with a Krylon 18 Kt. gold leaf pen. Well, I edged one card (the first one). You have to shake up the pen before using it. After shaking it, I took the lid off; big blobs of gold leaf ink came out and dripped all over one of the finished images. I must not have replaced the nib properly when I put in a new one. When will I learn to move the artwork out of harm's way?
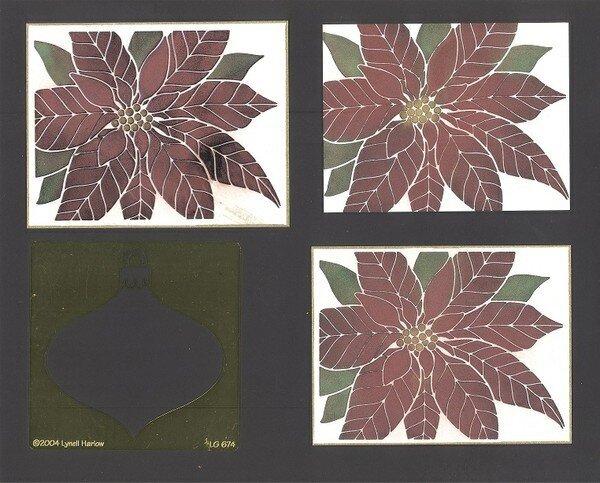
The ruined image is now on the third card. I was able to cover up most of the mess with the black cardstock after using the oval ornament stencil to cut out the opening. I cut the silver top and hook out of shiny silver cardstock. It looks dark in the scan.
Note regarding matte vs glossy embossing pastes with mica powders: Both are very beautiful, but I prefer the soft feathery look of the powders on the matte paste. The card with the glossy paste is shiny and more slick. The last picture shows the three images. I hope that you will be able to see the difference.
TFL.
Daria
No products have been added to this project.


Thanks for spreading positivity!