FREE Standard Shipping on Orders $69+ with code:
FREESHIPPING


Cheers
Be the first to cheer this project!
Give a Cheer
Be the first to cheer this project!

 Give a Cheer
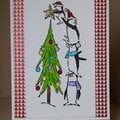
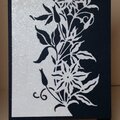
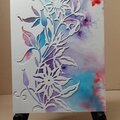
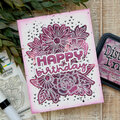
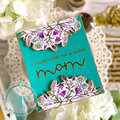
After going to a workshop on embossing and heating copper, Nora and I got together for a practice session. We started with practice pieces. You should see Nora's; she did a cool Zentangle; I hope she posts it! If you are interested in how to emboss and heat copper, take a look at the gallery post about the class: http://www.twopeasinabucket.com/gallery/member/108705-djc/1711509-metal-art-framed-workshop/?c=t [twopeasinabucket.com]Card:4 1/4“ x 5 1/1” Black Cardstock – BazzillSecond Mat – Judikins Matte-Kote inked with Mica Gloss InksFocal Image:Ten Seconds Studio CopperFlowers – Magenta Stamp (2nd picture above)Folk Art Artists' Pigment, Pure Black (by Plaid)Ten Seconds Studio Humungo Killer Tape (double-sided adhesive sheet)Sentiment:Michael Strong StampVersaFine Onxy Black Ink PadRanger's Clear Superfine Embossing PowderI had originally planned to use the stamped side of the card as the front as we did in the workshop but decided there was just too much black in the design. I could hardly see the embossing. So I flipped it over and used the back side. All the puff embossing I did is on the back! Actually, having the debossed side on top has an advantage; I didn't have to use spackle to fill in the puffed areas, and people can touch the top now without ruining the design.It was easier to emboss this time since I had my tools from Ten Seconds Studio plus it was my second time. I also had an easier time heating the metal. I was doing really well, remembering not to remove the metal from the candle flame until I was finished, but there was a complication. I was using a tall candle, and I let the metal go down too far and accidentally put out the flame. There was a section that didn't get to change color. Sigh. Once I had spread on and wiped of the black acrylic paint, that was no longer noticeable.TFL. Daria
No products have been added to this project.

Thanks for spreading positivity!