Thank YOU! It's Customer Appreciation Week!
EXTRA 11% OFF Orders $100+ With Code: THANKYOU
EXTRA 11% OFF Orders $100+ With Code: THANKYOU
Be the first to cheer this project!

 Give a Cheer
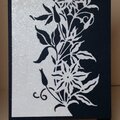
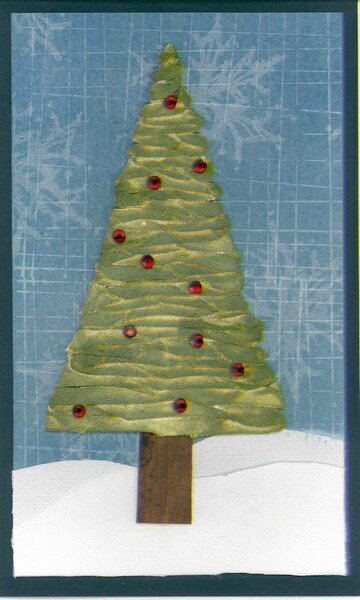
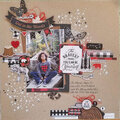
Another late entry. For directions for making this tree and the double-resist background, see Jennifer McGuire's Holiday Thinking Inking Classes, Week 6, on the Education Board.
I cut the base of the tree from a piece of green cardstock. the trunk was cut from a piece of thin wood I saved from an old Christmas card (not homemade!)
I put the base of the tree through a Xyron machine to add adhesive. I tore six 1/2 strips from the long side of the Sticky-Back Canvas to make the tree. I was surprised to see how much I needed.
TIP: I added Sticky-Back Canvas to make the snow. After attaching it, I thought it would be a good idea to spritz it with the Perfect Pearls solution. That made the ink below it bleed into the canvas. So I cut some more canvas, sprayed it before attaching it, dried it, and attached it over the first one. That seems to work.
Details:
5 1/4 x 8 1/2"
Bazzill Cardstock
Judikins Glossy White Cardstock
Claudine Hellmuth Studio Sticky-Back Canvas (tree and snow)
Hero Arts Modern Lines Background
Art Impressions Snowflake
Distress Embossing Ink
Distress InksShabby Shutters & Peeled Paint (tree) and Weathered Wood and Stormy Sky (background)
Perfect Pearls & Water Mist (tree and snow)
Crystal Stickers Elements, Elements by Mark Richards
TFL. Daria
No products have been added to this project.

Thanks for spreading positivity!