Storage & Organization up to 60% OFF!
Plus, Take an Extra 7% OFF With Code: STORAGE
Plus, Take an Extra 7% OFF With Code: STORAGE
Be the first to cheer this project!

 Give a Cheer
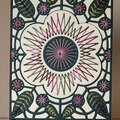
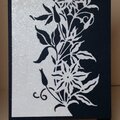
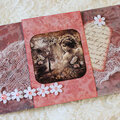
I don't usually dry emboss, but I grabbed this stencil to show someone how to do it this weekend. Later I thought I might as well finish it. I'm glad I did.
I rubbed wax paper over the cardstock before dry embossing it to make it easier to move the stylus over the design. If you aren't familiar with dry embossing, my tip is that you do not rub the stylus all over the openings in the stencil. You just go around the edges of the openings and push the paper toward the edges.
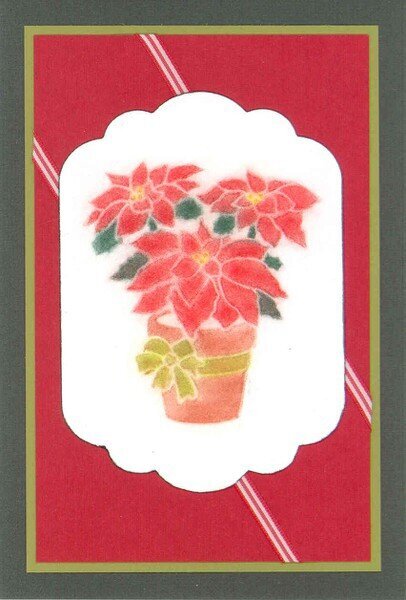
I started to apply the Soft Pastels with Q-Tips but found them too hard to control; I switched to pom-poms. I found the pastels to be more forgiving than I thought they would be. I was able to erase them with a chalk eraser. After I had sprayed the whole thing with a workable fixative, I realized I had mistaken the ribbon that goes around the pot for part of the pot and colored it terra cotta. Also, I hadn't put in enough leavestoo many red petals. The next day, I went back in with the eraser and was able to remove some of the color even after using the fixative. I fixed the ribbon and the leaves, and I added more color to the petals. I sprayed it all with fixative again and liked it much better.
DETAILS:
4 5/16 x 6 5/16
Bazzill cardstock card and red mat
Stampin' Up! cardstock olive mat
Unknown white cardstock
Dreamweaver stencil
Wax paper
Light Box
Stylus
Rembrandt Soft Pastels
USA Art Quest Handy Clip
Pom-poms
Winsor & Newton Artists Workable Fixative for Pastel, Charcoal, & Pencil
Chalk eraser
Nestabilities Labels Eleven
Tombow Marker (to edge the label)
Unknown ribbon
TFL. Daria
ETA: The image in the scan seems a bit blurry; IRL, the image is sharper than this.
No products have been added to this project.

Thanks for spreading positivity!