FREE Standard Shipping on Orders $69+ with code:
FREESHIPPING


Cheers
Be the first to cheer this project!
Give a Cheer
Be the first to cheer this project!

 Give a Cheer
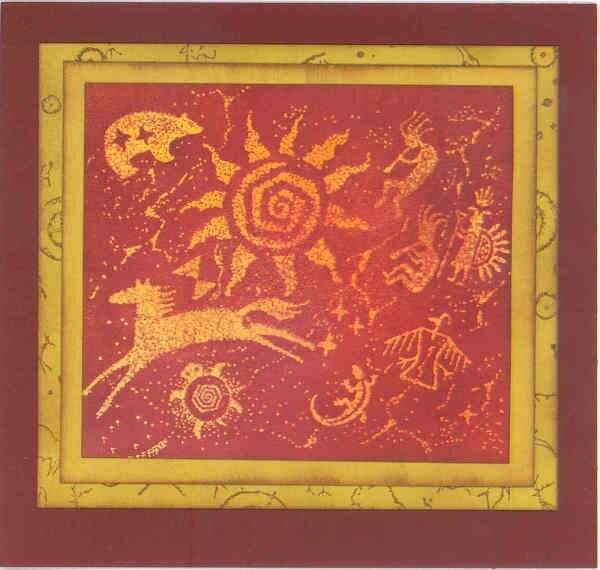
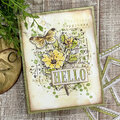
Lesson Learned: When you have completed a card and notice a slight imperfection, leave it alone! Do not try to fix it. I ruined the first card front by trying to apply just a bit more ink. When I wiped off the excess ink I rubbed away some of the cardstock. I also got a spot of Aged Mahogany on the matting. I made two more card fronts trying to get one that I liked as well as the first one. I still like the ruined one best.
I made these cards after watching Jennifer's video from Stamp Camp, Fall 09, Week 2Enhanced Backgrounds. This is her Multi-Color Emboss and Ink Background. It's like Joseph's Coat without the brayer, glossy cardstock, or black ink. I love it. I love using background stamps, and that's the focus of Nichol's Week 4 Stamp Camp Class.
5 3/4 x 5 1/2
Bazzill cardstockGumbo and one from the old Monochromatic sets
Judikins Background Stamp
Embossing Arts Co. Petroglyphs image
Distress Inks
1st card SU vanilla ultra-smooth cs inked with shabby shutters, dried marigold, scattered straw, and mustard seed
2nd card SU vanilla ultra-smooth cs inked with scattered straw, dried marigold, spiced marmalade, and fired brick
Both Cards Petroglyph image stamped on inked cs with VersaMark and heat embossed with clear detail EP
Aged Mahogany applied over entire surface, excess ink wiped off with damp rag, and then edged and distressed with Vintage Photo
Background matting stamped with Vintage Photo
Both mattes edged and distress with Vintage Photo
Jennifer and Nichol, thank you for the classes. So far, I've made six cards using my background stamps.
TFL. Daria
No products have been added to this project.


Thanks for spreading positivity!