FREE Standard Shipping on Orders $69+ with code:
FREESHIPPING


Cheers
Be the first to cheer this project!
Give a Cheer
Be the first to cheer this project!

 Give a Cheer
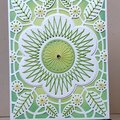
The green card was inspired by a card made by Sandy Halliburton on the Enjoy Michael Strong Group. She used the same embossing folder and the same mini-flowers. The only differences were in the way we added color to the background and that I used shrink plastic for the flowers. Thank you, Sandy.
1st card 4 1/4 x 5 1/2
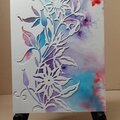
2nd card 4 3/4 x 5 7/8
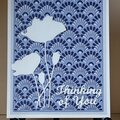
3rd card 4 3/4x 6
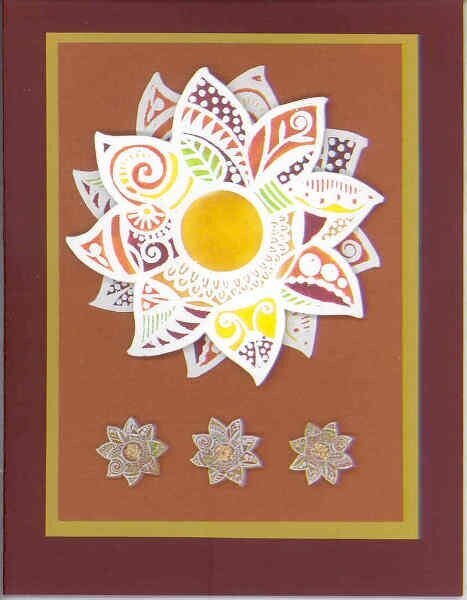
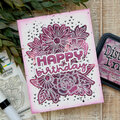
Card 1. Bazzill cscard and mattingMichael Strong stamp for focal image and embellishments
Focal imagestamped on white vellum with Versamark and heat embossed with Ranger's Seafoam White EP; colored on the back with TomBow Markers 837, 133, 946, 991, 055
CenterJudikins Diamond Glaze mixed with reinkers, Distress Scattered Straw and Nick Bantock Chrome Yellow; Judikins Prism Ultra Fine Glitter. This made the paper buckle a bit. I put a piece of white cs through the Xyron machine and attached the flowers before cutting them out. The white backing helps to keep the colors vivid. The top flower is pop dotted.
EmbellishentsI stamped the image with Brilliance Moonlight White on the smooth side of clear shrink plastic and colored with Prismacolor Pencils on the back that I had sanded. After cutting the images out and shrinking them, I added Scattered Straw Distress Stickles to the centers.
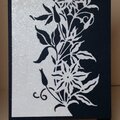
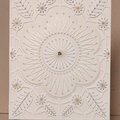
Cards 2 & 3: I used Jennifer's method of Cuttlebugging the background before using alcohol inks to make polished stone. On the green card, I used glossy cs, and on the magenta card, I used the matte side because the glossy side was debossed. I ended up liking the matte card very much. I sanded the green embossed image a lot; I did not sand the magenta one.
On the green card I used Adirondack Alcohol Inksoregano, meadow, and lettuce. On the magenta card, I used cranberry, raisin, and plum. That last card has fifteen Swarovski flatback crystals , clear, SS12.
Note 1: Notice that the embellishments are different on the green card. I had stamped on the side of the shrink plastic I had sanded; and when I went to color the back, the color pencil couldn't adhere to the smooth side. Being too lazy to sand the back, I just colored the same side I had stamped. I almost dumped these, but they actually looked better on the green card than the ones I did correctly which you see on the first card. The tops are clear plastic with the image and color on the bottom.
Note 2: Getting a good image with the MS flower took some practice. If I pressed too hard, I lost the detail. If I didn't press enough, I didn't get a complete image. I had to stamp several of these before I was happy.
Note 3: I had read somewhere about painting the back of something like my painted flower with gesso or white acrylic paint to make the colors pop. I thought I'd try that with the flowers instead of backing them with white cs. First the colors ran, but that's not what ruined the image. When I turned the image over, I could see that the vellum had warped and the embossing was coming off the paper. The next day it had all settled back into place and I thought I could save it, but when I touched it, the embossing started to crack and come off. I think that gesso method must have been used on acetatedefinitely not vellum. LOL
TFL. Daria
No products have been added to this project.


Thanks for spreading positivity!