FREE Standard Shipping on Orders $69+ with code:
FREESHIPPING


Cheers
Be the first to cheer this project!
Give a Cheer
Be the first to cheer this project!

 Give a Cheer
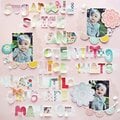
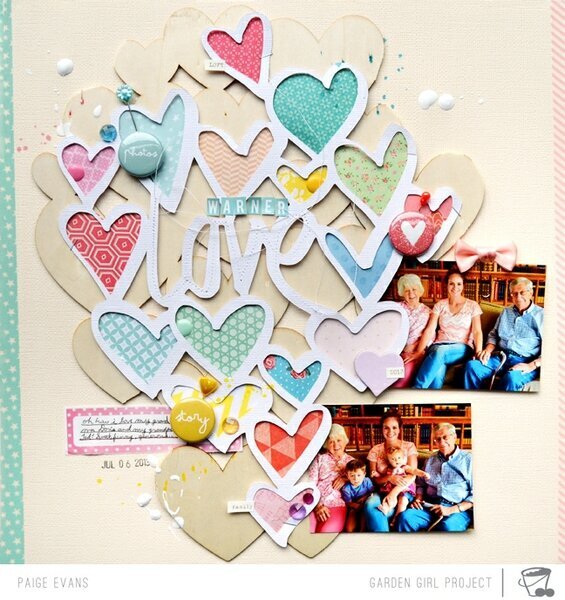
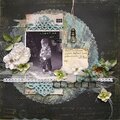
Description: When I found out the theme for May projects was “history/heritage” my mind immediately thought of the grungy, sepia-toned era that was so popular a decade ago… and is so not my style! But then we received the moodboard which our layouts are supposed to be based off of and I heaved a huge sigh of relief - because could it BE any prettier?! Who says history/heritage has to be vintage and shabby? Let's make family history pages bright and vibrant, happy and fun, like families should be! I gathered patterned papers and die cut the amazing “lots of hearts” background by Wilna Furstenburg. I am so glad we had the assignment to scrap history/heritage. My Grandpa Ted (or Grandpa Tedder the Gooder and Better) was recently placed in a nursing home with advanced dementia. We're not sure how much longer he has on this wonderful earth. I love him and my Grandma Doris so much and have so many wonderful memories of and with them. I got to live with them for almost two years while I was attending college. After I got married we would all (my brother, cousins and their spouses, etc) go over to their house for Sunday dinner. Not to mention all of my childhood memories of my grandparents, all of the vacations we took together, spending a week with them in Madrid while they were on a mission and I was on a study abroad in London, etc. I am so thankful for scrapbooking to preserve some of these memories in a visual format! I gathered products that matched the colors of the moodboard - mostly Daydreamer by Dear Lizzy and Styleboard by Maggie Holmes, plus little bits and pieces.Journaling says: Oh how I love my Grandma Doris and Grandpa Ted! Sweet, funny, generous…How to: Die cut the “lots of hearts” background from white cardstock then back the hearts with patterned papers. Sew over the “love” in the cut. Place the cut over a wood veneer heart background, trim the excess hearts, then staple the piece onto a cream cardstock layout background. Drop white paint and colored mist around the layout. Tuck two photos under the right side. Journal on a sticker and tuck it under the left side. Add mini alphabet stickers above the “love” to complete the title. Embellish with jewels, badges, a bow paper clip, enamel dots, stickpins, chipboard heart, typed word stickers, and more as shown. Stamp the date below the journaling. Wrap washi tape over the left and right edges. Supplies: Cardstock, wood veneer heart background, enamel dots, date stamp, pen, adhesive: American Crafts; Patterned paper: American Crafts, Crate Paper, Studio Calico; Badges: 2Peas, Evalicious; Stickers: American Crafts (label), Studio Calico (mini alphabet, typed words); Spray mist, jewels, bow paperclip, chipboard heart: Studio Calico; Paint: Americana; Sewing machine: Brother; Thread: Coats & Clark; Die cut machine: Silhouette Cameo by QuicKutz; Heart background cut file: Wilna Furstenburg for 2Peas; Stapler: Tiny Attacher by Tim Holtz; Washi tape, stickpins: Craft supply
No products have been added to this project.
Thanks for spreading positivity!