Thank YOU! It's Customer Appreciation Week!
EXTRA 11% OFF Orders $100+ With Code: THANKYOU
EXTRA 11% OFF Orders $100+ With Code: THANKYOU


Be the first to cheer this project!

 Give a Cheer
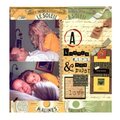
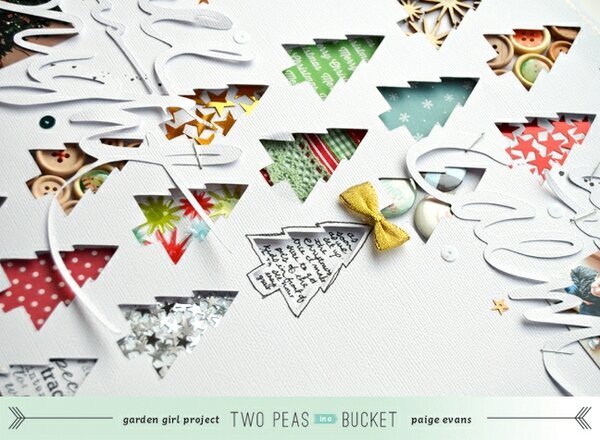
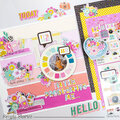
Description: I have never made so many Christmas layouts as I have this past holiday season! The Christmas lines and embellishments by American Crafts (Peppermint Express), Studio Calico (Magical), Crate Paper (Bundled Up), and Elle's Studio (Noel) are A.M.A.Z.I.N.G., so much fun to work with, and go so well together! And I love the exclusive 2Peas cut files - I used a couple sentiments as the final finishing touches. I followed the same format as the holiday mini album I made for the November 1st debut - backing shapes with seasonal embellishments such as sequins, ribbon, plastic die cuts, wood veneer shapes, buttons, stamps, badges, and more. Journaling says: As soon as we set up the Christmas tree I make sure to get pics of the kids in front of it to see how they've grown!How to: The video shows how to create the layout from start to finish. Here it is written: Die cut three columns of Christmas trees from the middle of a full sheet of white cardstock. On a block of 6x12“ white cardstock, place the die cut page on top and trace inside the trees. Figure out what each tree will be filled with: foam asterisk stickers, wood buttons, stamping, wood veneer starbursts, patterned paper, star sequins, badges, ribbon, plastic star die cuts, snowflake stickers, and more. Leave one blank for journaling. Fill the trees with the embellishments then adhere the die cut page over the trees. Write journaling in the empty tree and outline that tree with a black pen. Add a gold bow to the top of the journaling tree. Place a photo on the top right and bottom left corners. Die cut sentiments from white cardstock - I used the exclusive 2Peas cut files that say ”all is calm“ and ”all is bright". Staple the die cuts over the photos. Drop black spray mist over the top right and bottom left corners then sprinkle on some sequins. Outline the layout with white glitter glue. Stamp the date on the bottom left corner to finish.Supplies: Cardstock, patterned paper, foam asterisks, snowflake stickers, ribbon, pen, adhesive: American Crafts; Badges: Crate Paper, Studio Calico; Wood buttons: American Crafts, Crate Paper; Star sequins, wood veneer starbursts, spray mist: Studio Calico; Stamps: American Crafts (roller date), Elle's Studio (sentiments); Ink: StazOn; Staples: Office supply; Die cut machine: Silhouette Cameo by QuicKutz; Sentiment cut files: twopeasinabucket.comChallenge: Use up your Christmas embellishments! Every month a winner from all the SCRAP YOUR STASH entries will be drawn and rewarded with a $10 gift certificate. Winner will be announced on the 2Peas blog!Release date: December 26th 2013
No products have been added to this project.


Thanks for spreading positivity!