Thank YOU! It's Customer Appreciation Week!
EXTRA 11% OFF Orders $100+ With Code: THANKYOU
EXTRA 11% OFF Orders $100+ With Code: THANKYOU


Be the first to cheer this project!

 Give a Cheer
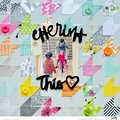
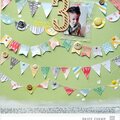
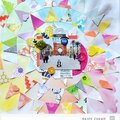
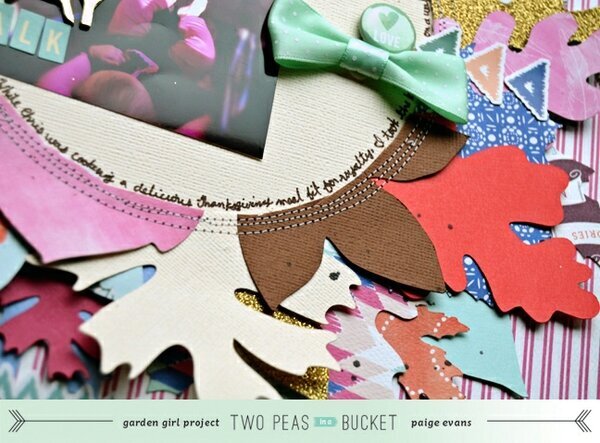
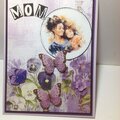
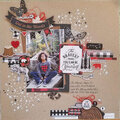
Description: The new Wildflower collection by Carta Bella is incredibly versatile! By picking and choosing the right papers it can be used for all sorts of subjects - use the earth-tones for Thanksgiving, the reds and greens for Christmas, the pastels for Easter, and so much more! As soon as I laid my eyes on this line I wanted it; HAD to have it :) Adding a dash of gold embellishments completes the fall-themed look that I was going for. Since this video went up on Thanksgiving, I decided to scrap a picture from our Thanksgiving 2012. It's not the typical “people-sitting-around-a-dinner-table-eating-turkey” photo that you would normally scrap about for your Thanksgiving pages. Instead, I found a picture of my daughter in her stroller and my son walking ahead on an afternoon stroll while Daddy was at home cooking our Thanksgiving Day dinner. I love how the Instagram filter I chose coordinates perfectly with the colors of the Wilderflower line. And going along with the fall theme that Thanksgiving reminds me so much of, I decided to use leaves, leaves, and more leaves as the main embellishment. My handy dandy Silhouette die cut machine did most of the work to cut all the leaves I needed to make my leaf frame.Journaling says: While Chris was cooking a delicious Thanksgiving meal fit for royalty I took the kids on a walk to enjoy the California sunshine. We have so much to be grateful for! 11/22/12How to: The video shows how to create the layout from start to finish. Here it is written:Trim a 4“, 3” and 2" square from all the papers in the Wildflower collection as well as coordinating colors of cardstock and gold glitter paper. Die cut leaves from the squares. Trace a round object onto the center of a purple striped paper layout base and use an exacto knife to cut out the circle. Adhere the large leaves all around the open circle then re-trim the circle. Sew around the circle to define the edge and keep all the leaves in place for eternity. Tuck the smaller leaves behind the larger leaves. Back the opening with cream cardstock then sew around the circle a couple more times. Tuck a photo under the left side of the circle and place a Thickers title over the picture. Add arrow stickers on the left and right sides of the circle and embellish with a badge and ribbon bow sticker. Journal around the inner edge of the circle. Trim a border sticker in half and place the halves along the top and bottom center edge of the layout. Drop black spray mist over the top left and bottom right edge. Done and done!Supplies: Cardstock, gold glitter paper, pen, adhesive: American Crafts; Badge, spray mist: Studio Calico; Ribbon bow: Crate Paper; Stickers: American Crafts (gold foam and chipboard foil letters), Carta Bella (arrows, border), October Afternoon (blue mini alphabet); Sewing machine: Brother; Thread: Coats & Clark; Die cut machine: Silhouette Cameo by QuicKutz; Leaf designs: 4 Leaves by Lori Whitlock (Design ID #20959), 3 Leaves by Lori Whitlock (Design ID#20749), 3 Leaves by Lori Whitlock (Design ID#20750)Challenge: Use up your leaves stash! Every month a winner from all the SCRAP YOUR STASH entries will be drawn and rewarded with a $10 gift certificate. Winner will be announced on the 2Peas blog!
No products have been added to this project.
Thanks for spreading positivity!