Thank YOU! It's Customer Appreciation Week!
EXTRA 11% OFF Orders $100+ With Code: THANKYOU
EXTRA 11% OFF Orders $100+ With Code: THANKYOU


 Give a Cheer
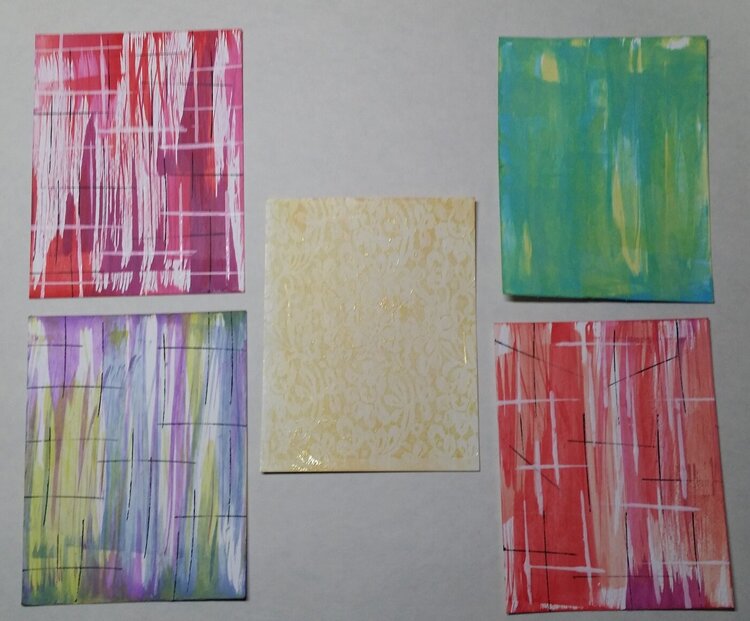
I made these backgrounds for Jan's Happy Mail Swap Challenge. I used the Credit Card Technique as described by Karen Dunbrook.
Supplies:
Neenah Classic Crest Solar White 110-lb. cardstock (backgrounds in the corners)
Specialty Stamping Paper (background in the center)
Distress Oxide Inks
Golden Fluid Acrylics, Titanium White
Colors, going clockwise:
Background #1
Candied Apple, Picked Raspberry, and Seedless Preserves
I used Black Soot to make lines. I also used Golden Fluid Acrylics, Titanium White, to make lines.
Background #2
Twisted Citron, Cracked Pistachio, and Peacock Feathers
This was the first one I made, and the ink spread a lot more than I had anticipated. I ended up with the cardstock completely covered with ink. It doesn't even resemble the backgrounds that Karen (and everyone else) made.
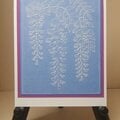
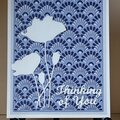
Background #3
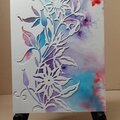
Twisted Citron, Wilted Violet, and Faded Jeans.
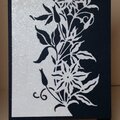
I used Black Soot for the lines. I did not make any white lines on this one. This is the one I chose to make into a card for the Happy Mail Swap.
Background #4
Candied Apple, Picked Raspberry, Seedless Preserves, Fired Brick
I was surprised that the Fired Brick turned out to be a melon color.
I used Black Soot to make lines. I also used Golden Fluid Acrylics, Titanium White, to make lines.
Background #5 ( in the center)
Wild Honey, Spiced Marmalade, Fossilized Amber
For this one, I tried using Specialty Stamping Paper. It is very slick so I wondered if the Distress Oxide Ink would dry on it. Another participant had used glossy card stock, and the ink did not dry (because it is partially a pigment ink), but it did leave behind color when she wiped it off. With the Specialty Stamping Paper, the colors all blended together instantly. I could barely make out the separate colors. It didn't dry either. Before wiping the ink off the paper, I stamped one of Stampin' Up's Lacey backgrounds with Versmark ink and heat embossed it with clear detail embossing powder. When it was too late to turn back, I realized that the wet Distress Oxide ink would also pick up the embossing powder, but it did not. I have no idea why it didn't, but the only thing that embossed was the stamped pattern. After that, I wiped down the paper to remove the excess Distress Oxide ink so that the embossed lacy pattern would show up darker. That worked. Like background #3, this background did not turn out the way a Credit Card Swipe Technique background should. It was a fun experiment, and I can still use the background. (I know. I could get the same look without half the effort by just using the emboss resist technique.
TFL.
Daria
ETA: Tim Holtz, Jennifer McGuire and others have posted videos about using Distress Oxide Inks on glossy cardstock. They used a heat gun to dry between applications of ink and then set it with Distress Glaze to make it permanent. The results were beautiful.
No products have been added to this project.


Thanks for spreading positivity!


January 22, 2019
January 22, 2019