

Storage & Organization up to 60% OFF!
Plus, a FREE Gift! | Details Here.
Plus, a FREE Gift! | Details Here.


 Give a Cheer
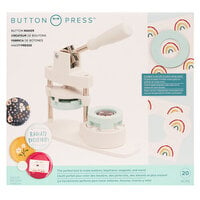
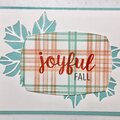
The larger buttons take a bit more care and work, but I got really beautiful results with this Dress My Craft cardstock.
The final step where you smoosh the back piece onto the front is where you have to apply considerably more pressure than with the small or medium. It wasn't too bad for me, but if you have arm, neck, or back issues, it might be an issue.
The die piece (first step) barely fits into the press, so this is where rotating and pressing is essential to get an even cut. The dies have markings dividing them in quarters to help with alignment, so I used the largest one to mark my white cutting base. That way I can accurately rotate and not lose track. I hope the photos show what I mean.
Also, I recommend rotating the base, not the die itself. And I use a tiny bit of tape to keep the paper attached to the underside of the die. I didn't have problems with it slipping, but it's a habit from years of die cutting.


Thanks for spreading positivity!


November 09, 2020
November 09, 2020