Thank YOU! It's Customer Appreciation Week!
EXTRA 11% OFF Orders $100+ With Code: THANKYOU
EXTRA 11% OFF Orders $100+ With Code: THANKYOU


Be the first to cheer this project!

 Give a Cheer
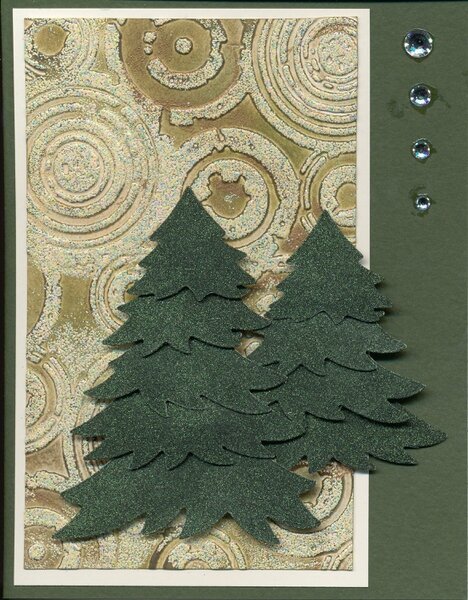
The last time we got together to craft, Nora and I tried out the Faux Patina Technique Angie Leach demonstrated in this video tutorial on Splitcoaststampers: http://www.splitcoaststampers.com/resources/tutorials/fauxpatina/.
Basically, you apply a very light brown die ink to the inside of the embossing folder on the side that has the image recessed. That way when you emboss your cardstock, the background will be inked, not the raised image. After embossing, you apply two medium colors to the raised areas; the directions called for a green and a blue to achieve the patina look. Then you add a very dark brown color. The last step is to randomly apply some clear embossing ink and gold embossing powder and heat emboss it.
We had a blast making several backgrounds trying out different color combos. I stuck to the rules until I saw the fabulous pieces Nora was turning out by using lots of different colors. We also tried out different embossing powders that Nora had grabbed from her stash--some with surprising results. Nora made some cards with one of her pieces right away: http://www.scrapbook.com/myplace/index.php?mod=galleries&u=967511&m=view&id=4633715&type=-1&start=18&size=0.
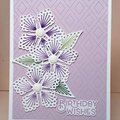
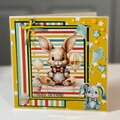
The funny thing is that she used her least favorite piece and so did I. Well, I used my least favorite and a similar one that I liked. I think they both made pretty cool backgrounds for these two Christmas cards I made for Cindi's Christmas All Year! Challenge, April Edition on Two Peas in a Bucket (now closed). Thanks, Cindi, for keeping us going.
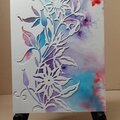
I'm sorry you can't see the glittery sparkle on these pieces. I tried photographing them, but the glitter still didn't show up.
CARDS:
4 ¼" x 5 ½"
Bazzill Cardstock (card base)
Unknown cream cardstock (mat)
Neenah Solar White (faux patina mat)
Swarovski Flatback Rhinestones, Crystal--SS30, SS20, SS16, and SS12
Ranger's Inkssentials Matte Accents (to attach the gems)
ATG Gun (to attach mats)
FAUX PATINA:
Embossing Folder--Tim Holtz Texture Fades, Retro Circles
Distress Inks (Card 1--Antique Linen, Festive Berry, Aged Mahogany Walnut Stain; Card 2--Antique Linen, Forest Moss, Faded Jeans, Walnut Stain)
Embossing Powders, unknown manufacturers (Card 1--Diamond Ice; Card 2--Lemon Luster)
CHRISTMAS TREES:
Elizabeth Craft Designs Die, 5-Part Pine
Elizabeth Craft Designs Double-Sided Adhesive
Neenah Solar White cardstock
Glitter Ritz Microfine Glitter, Moss Green
3M Mounting Tape & Pop Dots to assemble and attach trees
If you'd like to get details about using the 5-Part Pine die or double-sided adhesive check out my gallery post that tells about the workshop I attended:
http://www.scrapbook.com/myplace/index.php?mod=galleries&u=13464&m=view&id=4938013&type=-1&size=0&search=5%20part%20pine.
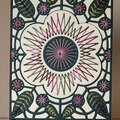
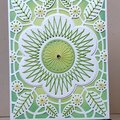
The last three scans show the other Faux Patina Backgrounds I made. If you try this out, you'll see that the effect is beautiful each step of the way. I had to force myself to add the subsequent layers of ink. The directions call for gold embossing powder, but we didn't use that.
1st of three:
Cuttlebug Embossing Folder, Poppy
Nora handed me Brass EP thinking it was gold. It turned out pretty cool--looks like copper.
Distress Inks--Antique Linen, Peeled Paint, Stormy Sky, and Walnut Stain over Gathered Twigs (The Gathered Twigs wasn't dark enough.)
Stampa Rosa Embossing Powder, Detail Brass
2nd of three:
Cuttlebug Embossing Folder, Poppy
Distress Inks--Antique Linen, Peeled Paint, Stormy Sky, and Forest Moss or Faded Jeans--not sure
On this one, I tried an embossing powder called Diamond Ice, no manufacturer listed. Wow! It was clear with glitter. When I embossed it, it turned the edges of the embossed image darker--a very beautiful effect. Nora and I started using it on everything in sight. It's a shame you can't see the glittery shine on this piece. It's so beautiful in real life.
3rd of three:
Cuttlebug Embossing Folder, Clockworks
Distress Inks--Mustard Seed, Frayed Burlap, Gathered Twigs, Stormy Sky, and Walnut Stain.
I didn't follow the directions on this one. Instead of applying a neutral ink to the inside of the embossing folder, I sponged Mustard Seed all over the cardstock base. Then I added Frayed Burlap, Gathered Twigs, and Stormy Sky to the raised areas. Lastly, I added a light touch of Walnut Stain.
I loved the last one just the way it was so I didn't add any embossing powder.
TFL.
Daria
No products have been added to this project.


Thanks for spreading positivity!