Cheers
Be the first to cheer this project!

Be the first to cheer this project!
 Give a Cheer
On Sunday I attended my second workshop given by Georgia Sommers at Jazzy Crafts in Castro Valley, CA. It was worth driving through torrential rains to get there. (I uploaded the Christmas cards we made at the first workshop to another gallery post.)
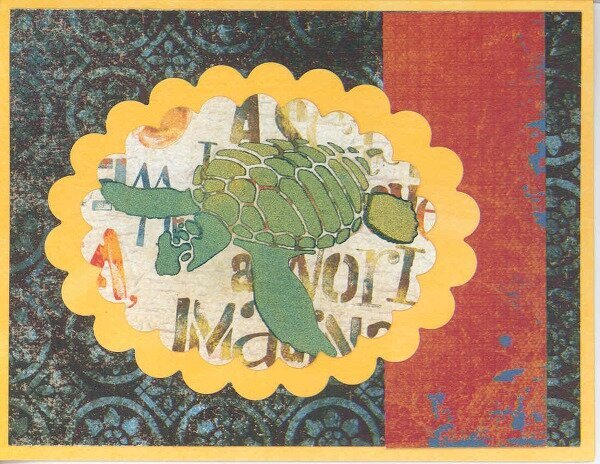
This time I found myself working out of my comfort zone, probably because of the patterned paper which I seldom use even though I love it and the images that weren't in my usual style. That said, I am definitely going to buy the globe stencil (Think cards for bon voyage, graduation, men, etc…), and I grew quite fond of the Lucky Tiki by time I'd finished working with him. He is being retired and was given to all of the participants as a gift.
All cards 4 1/4“ x 5 1/2”
Dreamweaver stencils
Various Dreamweaver Embossing Pastes
Dreamweaver Metallic F/X (mica powders)
Unknown cardstock and patterned paper (Sorry, we were told, but I forget what it was.)
5th card–Georgia had embossed this with matte black paste before class. I added glue and mica powders in the same way we did on the seahorse card. The patterned papers were two-sided. I chose the darker side for the matting. Georgia also gave us Sizzix cut-outs, a scalloped edge that I didn't use, and dimensional foam adhesive I forgot to use.
This was an informative and fun class. Georgia encouraged us to try out different pastes with different types of paper and cardstock. I didn't have time to do that, but I'll be following her advice here at home. One lady had the most beautiful seahorse; it looked like abalone shell. I think she had started out with glossy white paste. The man next to her had a wonderful, dramatic turtle; he had used darker colors with purples predominating. Wonderful effect.
TFL. Daria
No products have been added to this project.
Thanks for spreading positivity!