


Cheers
Give a Cheer

 Give a Cheer
4 ¼ x 5 ½ inches
Gina K. cardstock (card bases, except the dark green)
Carnival Vellum New Forest Green (dark green card base)
Neenah Classic Crest Solar White 110-lb. cardstock
Stampin Up Sassy Salutations
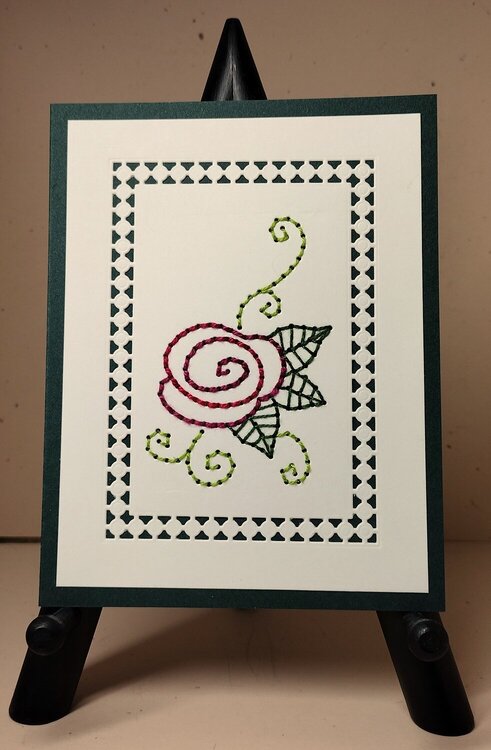
Marianne Design Corner Stitched Rose Die
Spellbinders Candlewick Rectangles Die Set
Spellbinders Hemstitch Rectangles Die Set
DMC Coton Perlé embossing floss, Size 5 (roses) and Size 8 (leaves and swirls)
DMC Coton Perlé Color Variations embossing floss, Size 5 (the flowers on first four cards)
Adirondack Cool Peri dye ink (to color the card base for the lavender card)
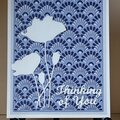
Distress Oxide Tattered Rose (to color the front piece of the second card cover up the red mark a piece of rubber left on the card stock.)
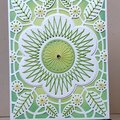
If you saw the last post, you saw that the edge of the die left lines on the cardstock. In this post, the cards have almost no lines.
I remembered reading about a similar problem many years ago. The edges of the narrow Cuttlebug embossing folders left lines on the cardstock. The post I read back then used a Gasket Kit from Home Depot. It has a red rubber piece, a rubbery cork piece, and a firmer black piece. The person used the black and red pieces. She cut them slightly smaller than the embossing folder and put them together with tape. She used them in place of a cutting plate. That way the edges didn't emboss. At least, that is what I remembered. I used Google to double-check that and found a post by Indigo Inkling that was helpful.
Of course, I bought the Gasket Kit which never got used. I pulled it out, cut the pieces, and taped them together. I put them over the Stitched Corner Rose die and ran it through the machine. It was awkward to do it without a top plate. Maybe I should have put the bottom plate on top? Instead, I tried it with a thin metal shim on top--not great. Then I tried it with the Gemini green plate for double-sided dies. That was better, but when I ran the whole thing through, the red rubber and the black piece slipped apart a bit and the rubber left a light red color along the bottom of the cardstock. No, it didn't erase off even with a sand eraser. I saved it thinking I could die-cut it again to save the pretty border. I set it aside.
Someone else had mentioned using the magnetic vent covers for a different purpose--to cut into instead of cutting into their plates. (These were old posts I was reading.) That made me wonder if I could use the magnetic vent covers (which I use to store my dies) to create a shim. I pulled out a leftover piece and cut two pieces the size of the die. I used the ATG gun to attach them together so they wouldn't shift. Then I started trimming them a hairline at a time and clipped the corners. The design on the stitched corner rose die goes almost to the edge so it was difficult to get the magnetic pieces to leave a border but still cover the part that die-cuts. We're talking 1/32 of an inch. The magnetic piece works great to place it exactly where I want it on the die.
After many efforts (I've condensed them here.), I ended up using three layers of the magnetic sheet. I ran it through using the green Gemini plate on top and the regular plate on the bottom. It works. It is not 100% perfect, but close to it. As proof of that, I was able to ink blend over the piece that had the reddish mark, and you can't see any reddish mark or any lines. I used Tattered Rose; it was a great match. See the second card. I'm satisfied.
You can probably do the same thing with chipboard shims, but the magnet helped to keep the shim in place.
TFL.
Daria
No products have been added to this project.


Thanks for spreading positivity!


May 04, 2023
April 17, 2023
April 15, 2023